
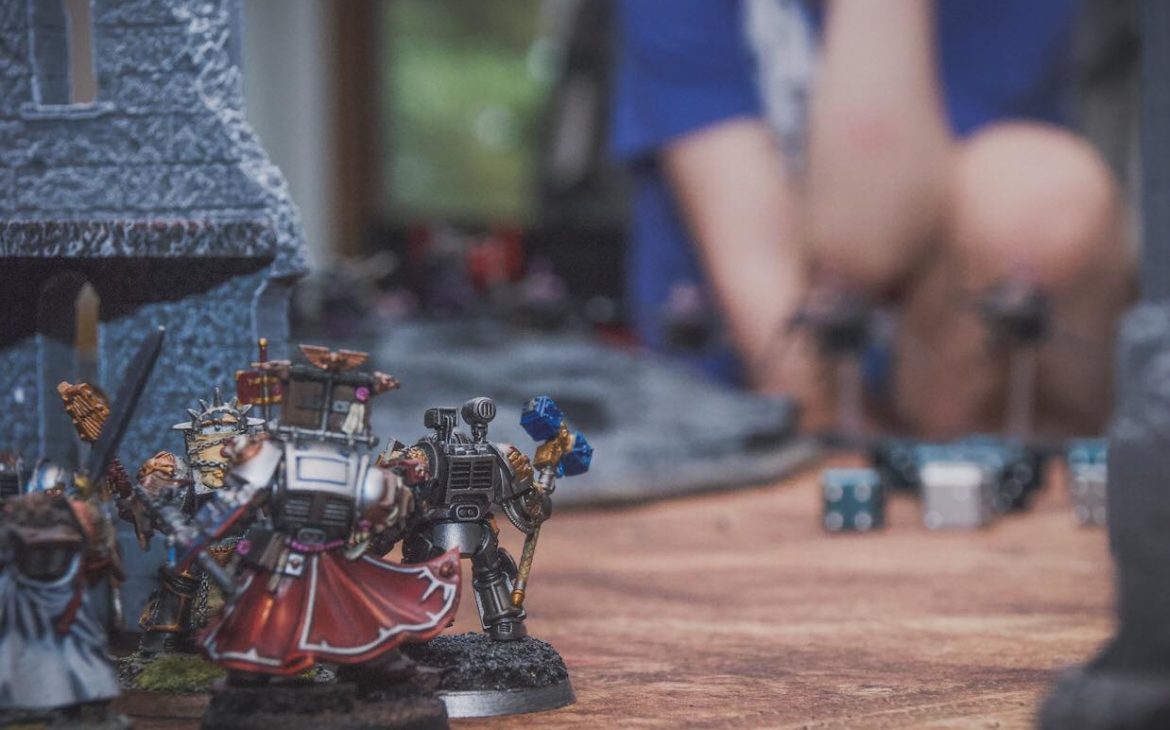
Remote Hammer Battle Report: Aeldari Vs. GREY KNIGHTS
A 2,000 Point Remote-Hammer Aeldari Crafty/Quins/Wraiths vs. Grey Knights in ITC Champions Mission Battle Report
Thoughts from the Filthy Casuals: Hey all, Bmoy here and we are excited to bring another old-school written battle report testing out Games Workshop’s “Remote Hammer” style of 40k.
To do this, we engaged GDFC’s Discord community to talk through the action on both sides of the battlefield. Overall, we really enjoyed the format as it brought us together in a fun and engaging fashion! Would definitely recommend giving this a try!
Overview: Like many of you, I’ve been in the lab thinking of new army lists to try out and wanted to test it out the old fashioned way of actually moving models and rolling dice on the tabletop. So we took a stab at playing a game with our Discord community helping to play the Grey Knights.
The Lists
2,000 Point Grey Knights Army
++ Battalion Detachment +5CP (Imperium – Grey Knights) [83 PL, 1,128pts, 7CP] ++
+ Configuration +
Battle-forged CP [3CP]
Detachment Bonuses: Show Bonuses
Detachment CP [5CP]
+ Stratagems +
Armoury of Titan [-1CP]: 1 Additional Relic
+ HQ +
Brother-Captain Stern [8 PL, 105pts]: Warp Shaping
Grand Master in Nemesis Dreadknight [14 PL, 214pts]: Dreadfist, Gatling Psilencer, Heavy Psycannon, Nemesis Greatsword, Sanctuary
Lord Kaldor Draigo [12 PL, 180pts]: Hammerhand, Sanctuary
+ Troops +
Strike Squad [7 PL, 89pts]: Gate of Infinity
. 3x Grey Knight (Halberd): 3x Nemesis Force Halberd, 3x Storm Bolter
. Grey Knight (Psycannon): Psycannon
. Grey Knight Justicar: Storm bolter
. . Nemesis Force Halberd: Nemesis Force Halberd
Strike Squad [7 PL, 86pts]: Gate of Infinity
. 3x Grey Knight (Halberd): 3x Nemesis Force Halberd, 3x Storm Bolter
. Grey Knight (Psilencer): Psilencer
. Grey Knight Justicar: Storm bolter
. . Nemesis Force Halberd: Nemesis Force Halberd
Strike Squad [7 PL, 89pts]: Gate of Infinity
. 3x Grey Knight (Halberd): 3x Nemesis Force Halberd, 3x Storm Bolter
. Grey Knight (Psycannon): Psycannon
. Grey Knight Justicar: Storm bolter
. . Nemesis Force Halberd: Nemesis Force Halberd
+ Elites +
Apothecary [5 PL, 88pts]: Armoured Resilience, Sanctic Shard
. Nemesis Daemon Hammer: Nemesis Daemon Hammer
+ Fast Attack +
Interceptor Squad [16 PL, 188pts]: Astral Aim
. 8x Interceptor (Falchions): 16x Nemesis Falchion, 8x Storm Bolter
. Interceptor Justicar: Storm bolter
. . Nemesis Force Halberd: Nemesis Force Halberd
+ Heavy Support +
Purgation Squad [7 PL, 89pts]: Gate of Infinity
. 4x Purgator (Psilencer): 4x Psilencer
. Purgator Justicar: Storm bolter
. . Nemesis Force Halberd: Nemesis Force Halberd
++ Supreme Command Detachment +1CP (Imperium – Grey Knights) [63 PL, 872pts, 1CP] ++
+ Configuration +
Detachment CP [1CP]
+ HQ +
Chaplain [8 PL, 107pts]: 5. Recitation of Projection, 6. Invocation of Focus, Astral Aim, Storm bolter
Grand Master in Nemesis Dreadknight [14 PL, 224pts]: 4: First to the Fray, Dreadfist, Dreadknight teleporter, Gatling Psilencer, Heavy Psycannon, Nemesis Greatsword, Sanctuary, Warlord
Librarian [9 PL, 101pts]: Artisan Nullifier Matrix, Edict Imperator, Empyrean Domination
. Nemesis Warding Stave: Nemesis Warding Stave
+ Elites +
Paladin Squad [32 PL, 440pts]: Gate of Infinity
. 7x Paladin (Halberd): 7x Nemesis Force Halberd, 7x Storm Bolter
. 2x Paladin (Warding Stave): 2x Nemesis Warding Stave, 2x Storm Bolter
. Paragon: Storm Bolter
. . Nemesis Force Halberd: Nemesis Force Halberd
++ Total: [146 PL, 8CP, 2,000pts] ++
Pretty much the same Grey Knights list that I’ve been playing for the past 3 – 4 months. More reps are always good and this will be a good test for the list as I think it does expose some weaknesses that Grey Knights have.
Bmoy’s 2,000 Point Aeldari Crafty-Quin-Wraiths Army
++ Spearhead Detachment +1CP (Aeldari – Craftworlds) [52 PL, 726pts, 1CP] ++
+ Configuration +
Craftworld Attribute. *Custom Craftworld*: Masterful Shots, Masters of Concealment
Detachment CP [1CP]+ HQ +
Wraithseer [10 PL, 135pts]: D-cannon
Wraithseer [10 PL, 135pts]: D-cannon
+ Heavy Support +
Night Spinner [8 PL, 112pts]: Twin Shuriken Catapult
Night Spinner [8 PL, 112pts]: Twin Shuriken Catapult
Wraithlord [8 PL, 116pts]: Ghostglaive, Shuriken Catapult, Shuriken Catapult, 2x Starcannon
Wraithlord [8 PL, 116pts]: Ghostglaive, Shuriken Catapult, Shuriken Catapult, 2x Starcannon
++ Vanguard Detachment +1CP (Aeldari – Harlequins) [31 PL, 568pts, ] ++
+ Configuration +
Detachment CP [1CP]Masque Form: The Soaring Spite: Serpent’s Blood
+ Stratagems +
Enigmas of the Black Library (1 Relic) [-1CP]
+ HQ +
Shadowseer [7 PL, 110pts]: Shards of Light, Shuriken Pistol, Twilight Pathways
+ Elites +
Death Jester [3 PL, 45pts]Death Jester [3 PL, 45pts]Solitaire [5 PL, 98pts]: Cegorach’s Rose, Harlequin’s Caress, Harlequin’s Kiss
+ Fast Attack +
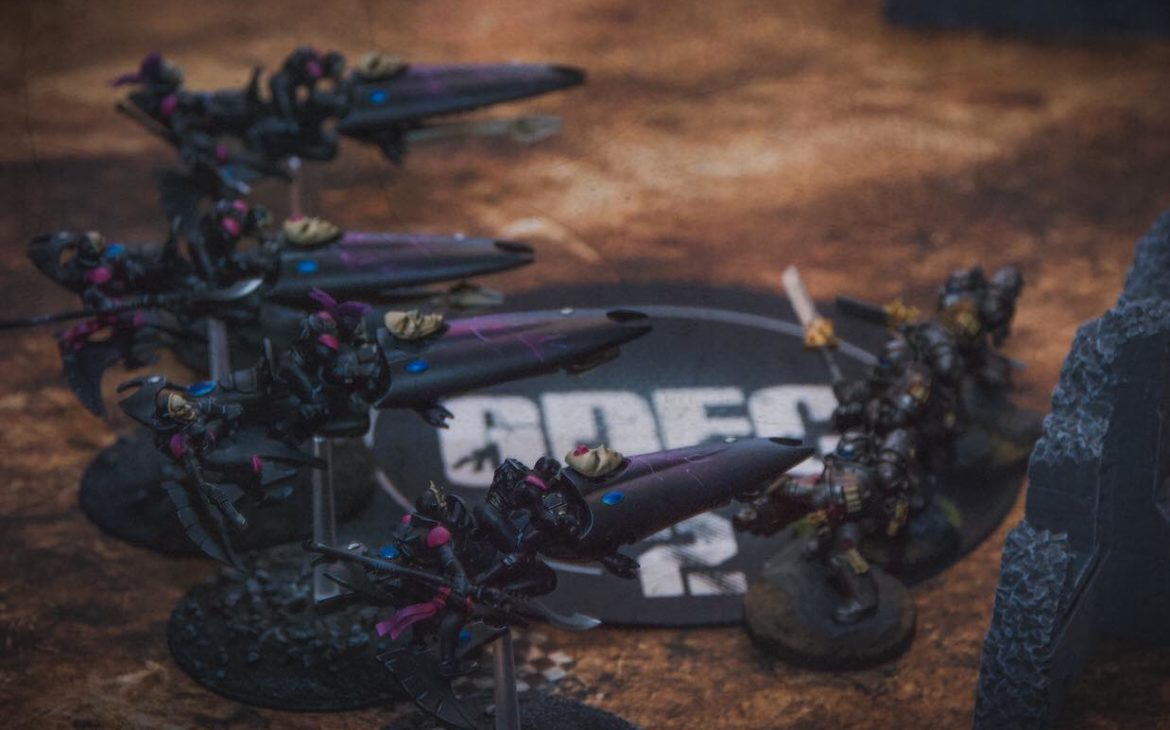
Skyweavers [13 PL, 270pts]. Skyweaver: Haywire Cannon, Zephyrglaive. Skyweaver: Haywire Cannon, Zephyrglaive. Skyweaver: Haywire Cannon, Zephyrglaive. Skyweaver: Haywire Cannon, Zephyrglaive. Skyweaver: Haywire Cannon, Zephyrglaive. Skyweaver: Haywire Cannon, Star Bolas
++ Battalion Detachment +5CP (Aeldari – Craftworlds) [48 PL, 705pts, 8CP] ++
+ Configuration +
Battle-forged CP [3CP]Detachment CP [5CP]
+ HQ +
Farseer [6 PL, 110pts]: 0. Smite, Shuriken Pistol, Witchblade
Yvraine [6 PL, 115pts]
+ Troops +
Rangers [3 PL, 60pts]: 5x Ranger
Rangers [3 PL, 60pts]: 5x Ranger
Rangers [3 PL, 60pts]: 5x Ranger
+ Fast Attack +
Hornets [27 PL, 300pts]. Hornet: 2x Hornet Pulse Laser. Hornet: 2x Hornet Pulse Laser. Hornet: 2x Hornet Pulse Laser
++ Total: [131 PL, 9CP, 1,999pts] ++
Been going at it in the lab writing a million new lists and this is one I’ve been extremely excited to test out. Ultimately, I really enjoy playing balanced lists with the traditional “hammer and anvil” style of gameplay that focuses on board control and utilizing your tools to either force your opponent to react to you to put them in a disadvantageous position. A couple of things this list does well:
1) Durability: Everything in this list is relatively durable and can survive small arms fire. Even the Rangers at -2 to hit with a 3+ save in cover can be hard to shift.
2) Board control: The T8 Wraiths accomplish a number of things for me but also provide some presence in the mid-field for me to gain control of certain areas of the board. While the Rangers are often used as screens or deep strikers to net me Recon or Behind Enemy Lines points, they can also funnel enemy characters into disadvantageous positions, depending on the terrain. The D-Cannons are also interesting as they do provide a sort of 24″ radius that makes opponents nervous when trying to camp in a ruin or magic box.
3) Firepower (mobile, indirect, long-range, and versatility): Firepower is obviously important, and I place an extra emphasis on firepower that can interact with their targets.
I love having mobile firepower that allows me to continue to put pressure on the board and get to targets that are out of position (e.g. Skyweavers and Hornets).
I value firepower that can put pressure on my opponents to react and punishes them for trying to sit in ruins/magic boxes to set up their own strikes (e.g. D-cannon Wraithseers, Nightspinners, even long-range threats like Skyweavers and Hornets can force my opponent out of position to try and deal with them).
I value firepower that has range that allows me to out range my opponents to keep my own firepower safe, or draws them into the open and out of position to deal with my own firepower (e.g. Hornets, Nightspinners, Wraithlord’s with Starcannons, even Skyweavers with their potential 44″ threat range).
I value firepower with versatility and tend to prefer weapons that can be deployed effectively against a plethora of targets
4) Varied sources of damage dispersed through multiple phases: I really love the ability to be dangerous in every phase of the game, ESPECIALLY my opponent’s turns. Enter, the Hornets. With as much stuff that comes from deep strike or reinforcements these days, having the ability to deal significant damage via the Forewarned stratagem is a huge boon in my opponent’s movement phase. This also controls my opponent’s movements as they often do not want to come down within view or range of the unit thus giving me more control over the game.
Both the Shadowseer and Yvraine can deal significant damage in the psychic phase (especially to characters with their targetable psychic mortal wound output) and the Farseer can chip in with some Smites if needed. This can be incredibly important when you just need a few reliable wounds to finish something off.
The list is strong in the shooting phase with all the different sources of firepower.
The list packs a strong combat punch with each Wraith able to deal with high Strength, High AP, and D6 damage. The Skyweavers, and Solitaire also provide additional sources of quality attacks
5) Options, tools, and flexibility: Ultimately, I really enjoy playing a tool-kit type of army. I love having units that can fill multiple roles on the battlefield. Just about every unit in this list can fill multiple roles, and address different list archetypes / enemy units.
6) Weaknesses: Admittedly, this list leans a little more towards character-driven, elite, or mech types of armies. Horde based lists that flood the table with volume of objective secured bodies, can pose a challenge. But fortunately, there are some decent sources of volume shots from the Hornets, and Night Spinners, but the Quin Skyweavers and Solitaire can also play huge here with their ability to attack twice and get some significant volume of attacks. Definitely a weakness, but there are tools to give me a fighting chance in those matchups.
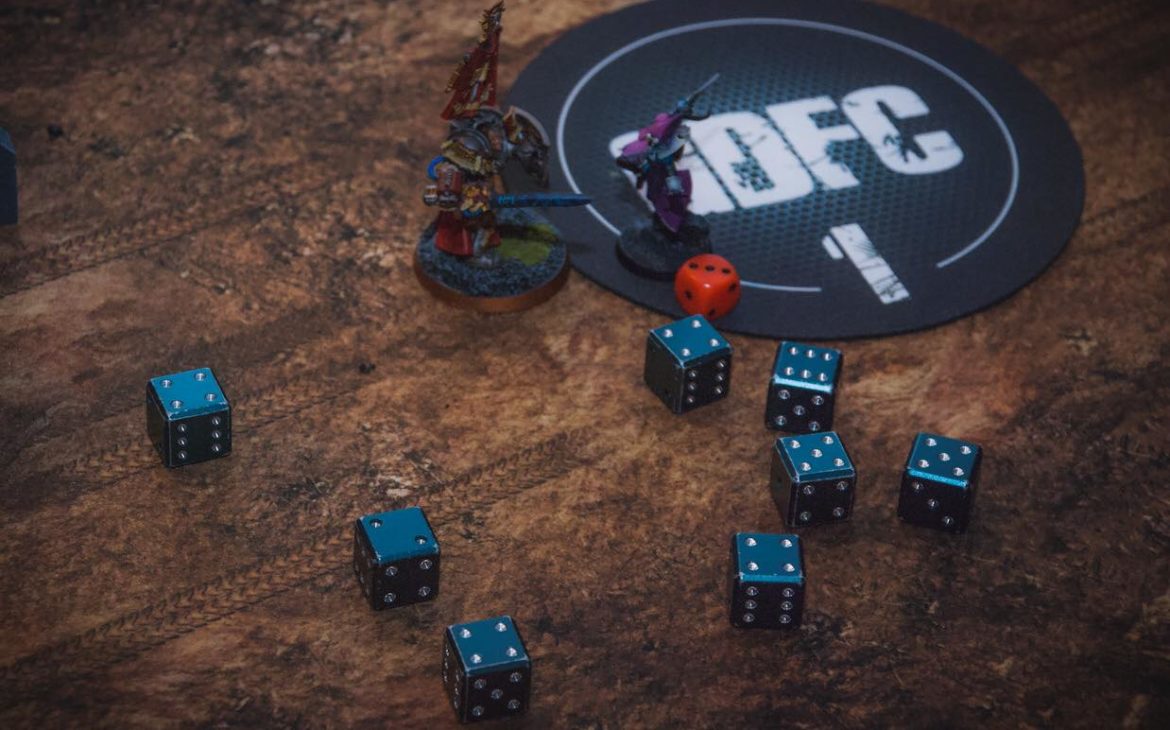
Pre-Game and Deployment
Attacker: Aeldari
Defender: Grey Knights
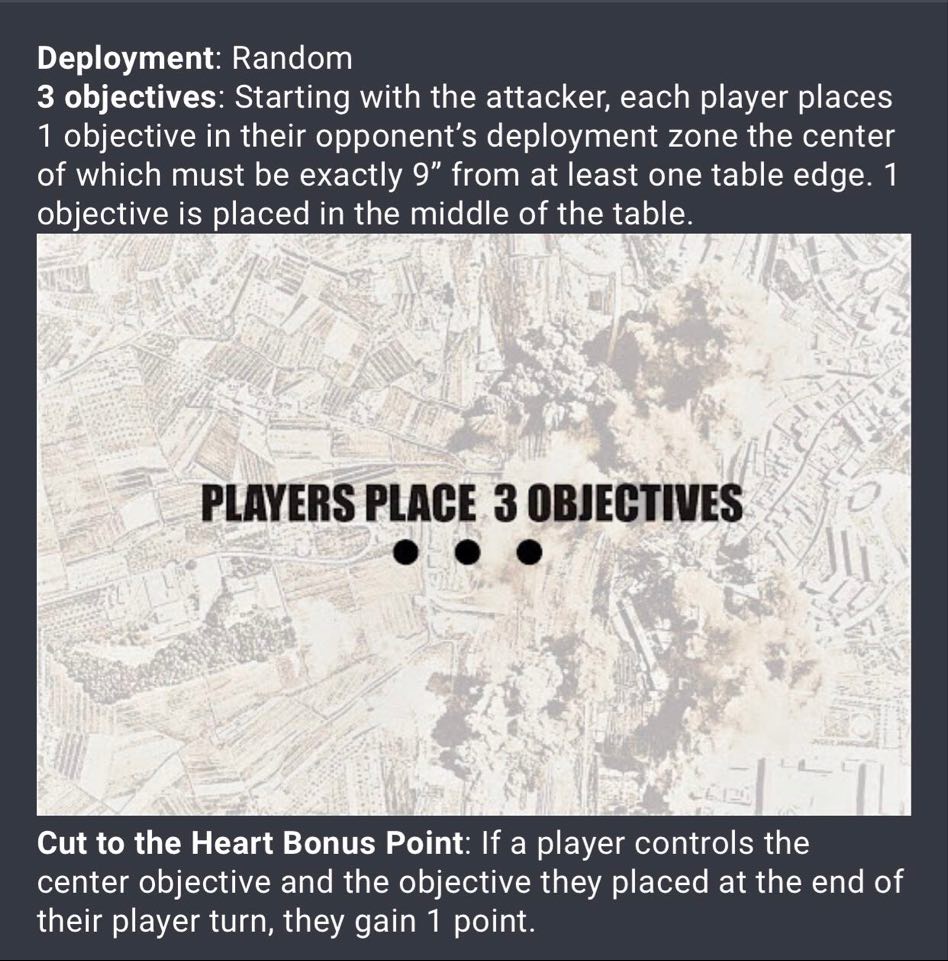
ITC Mission 2: Cut to the Heart
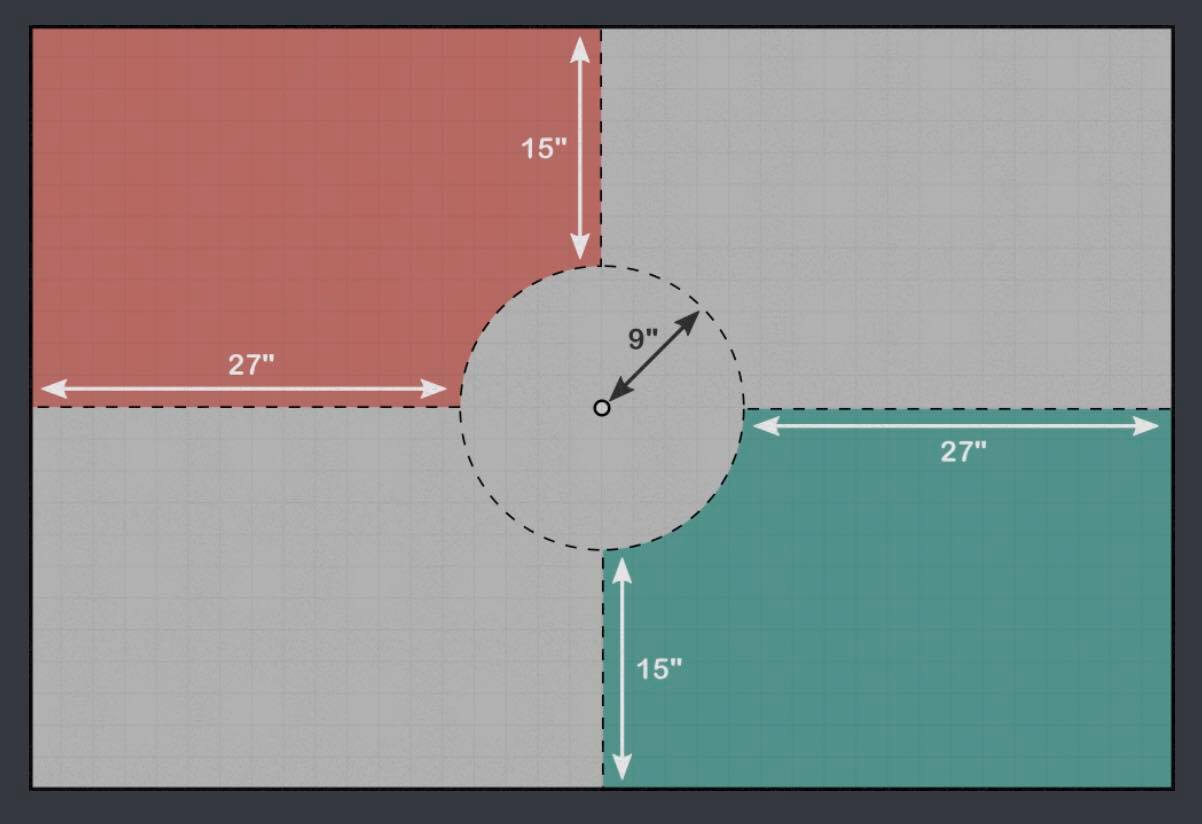
Deployment 3: Search and Destroy
Aeldari Secondaries: Gang Busters, Recon, Headhunter
Gang Busters was obvious because the Paladins are a crucial element to the GK gameplan. Recon was selected because I have options to deep strike and the mobility to get access to different sectors of the board. Headhunter was chosen based on the number of characters on the board (Grand Masters in Nemesis Dreadknights included)
Grey Knights Secondaries: Big Game Hunter, Gang Busters, The Postman
Commentary: Big game hunter was a no-brainer against the Aeldari list. The Aeldari list didn’t present many other obvious Seek and Destroy secondaries and we knew we would have to deal with the bikes so we chose Gangbusters. While we wouldn’t be able to max out this secondary, we didn’t want to pick secondaries that would force us out of position and felt that we had good tools to deal with the bikes. The Postman was selected on the Apothecary because Gate of Infinity could prove to be valuable in allowing him to get to all three objectives thus scoring all four points. Typically we would choose Behind Enemy lines but the Aeldari list and the board really makes deep striking into the Aeldari backfield difficult.
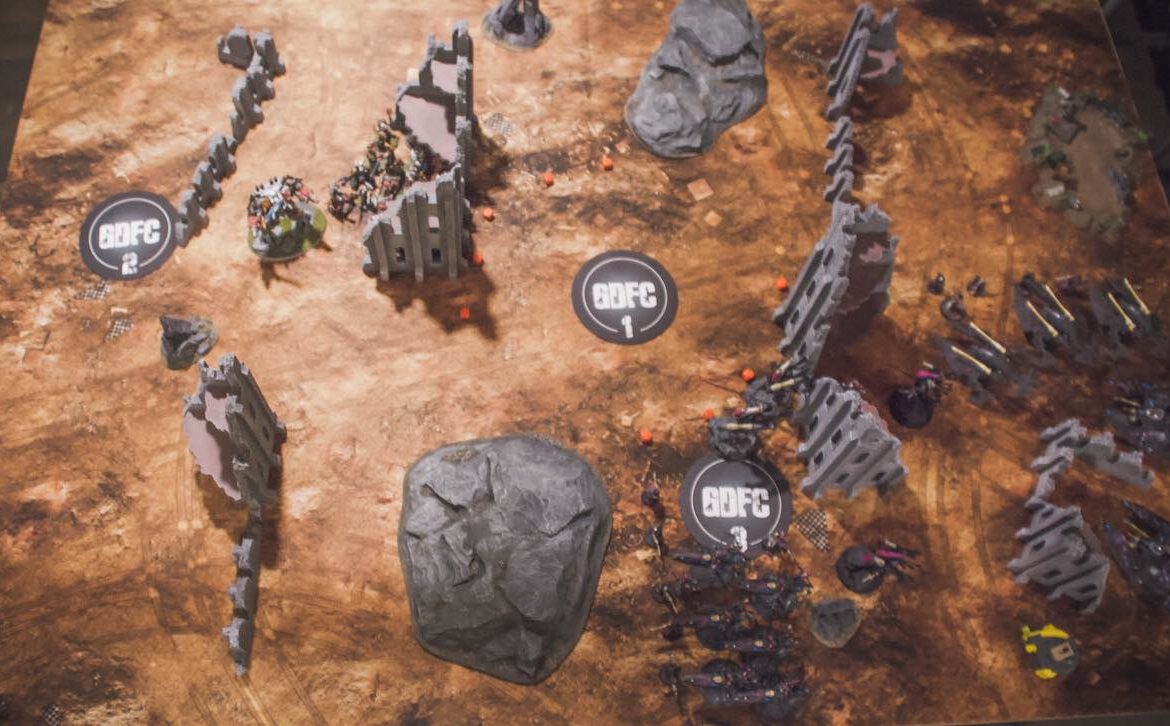
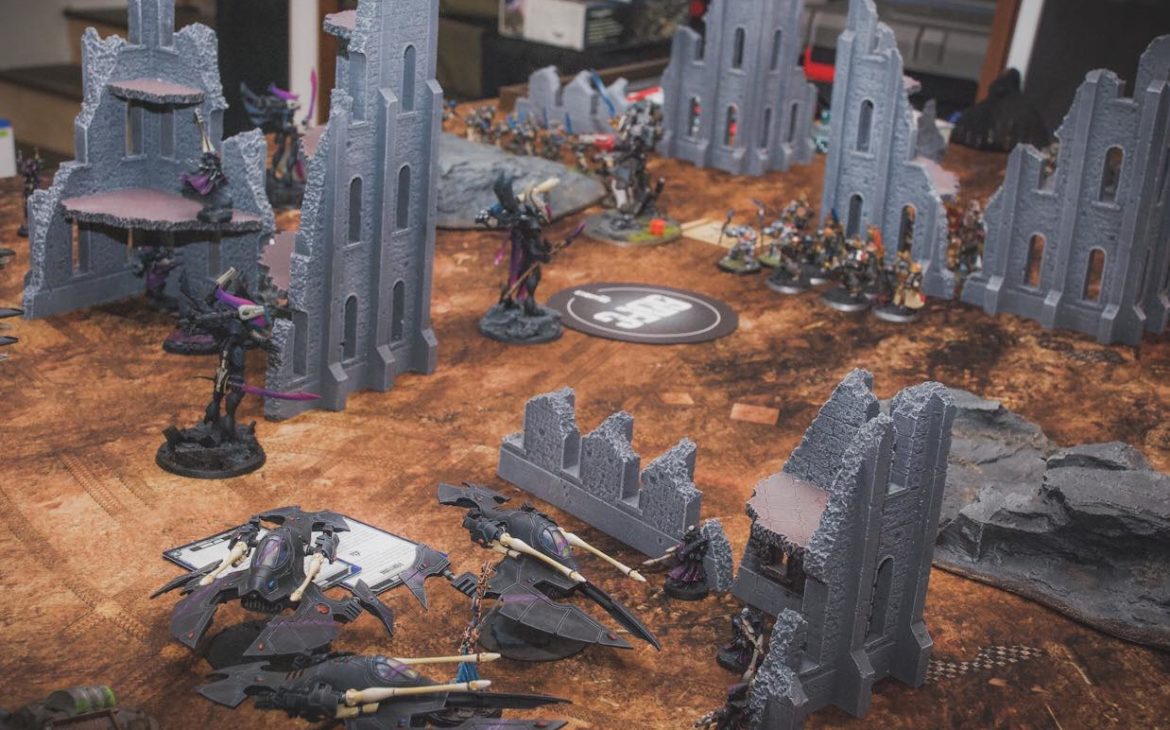
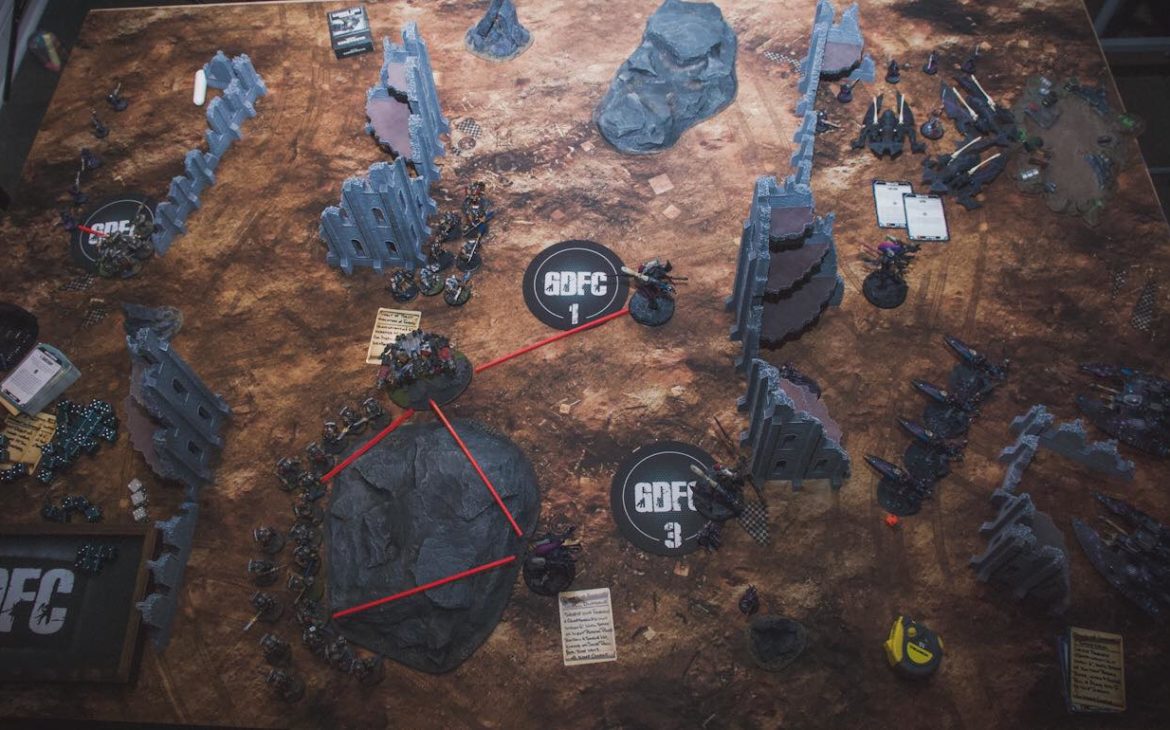
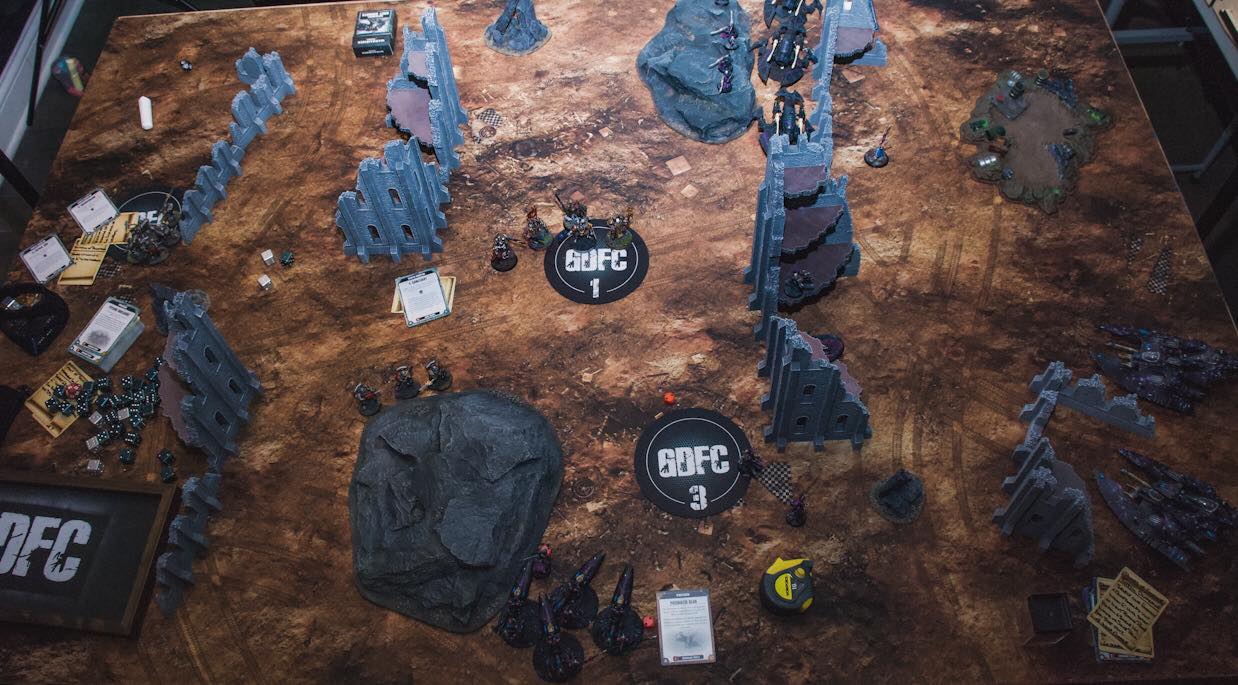
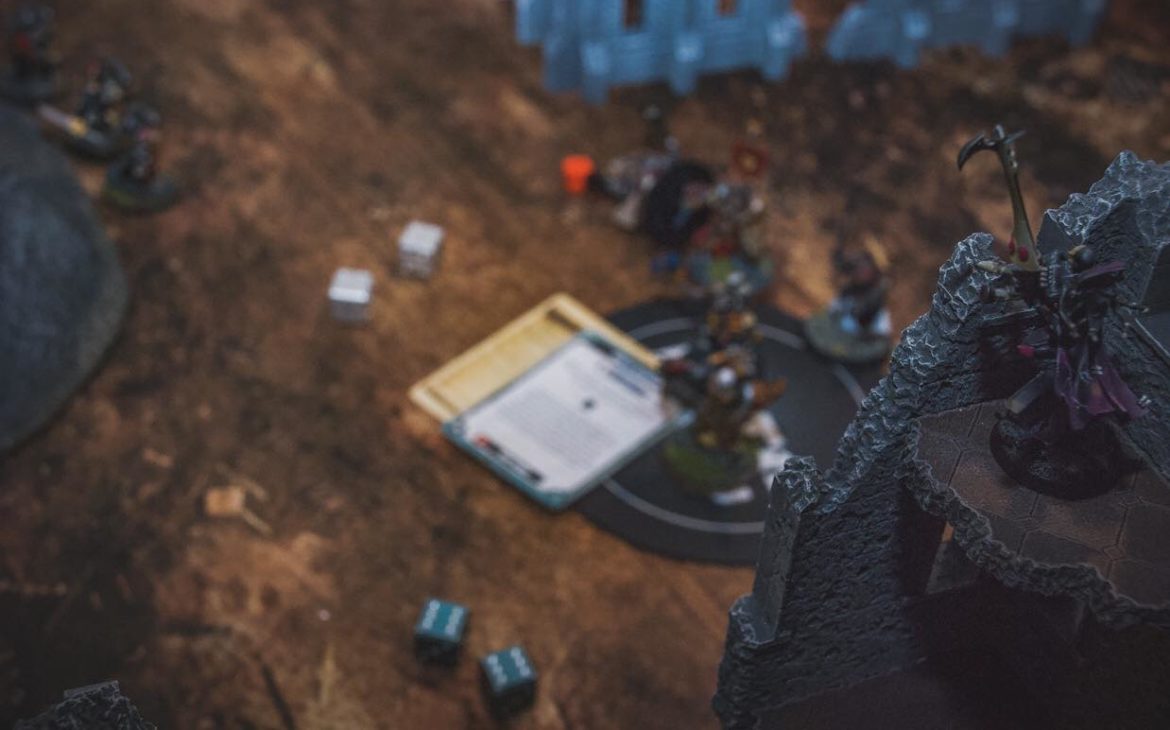
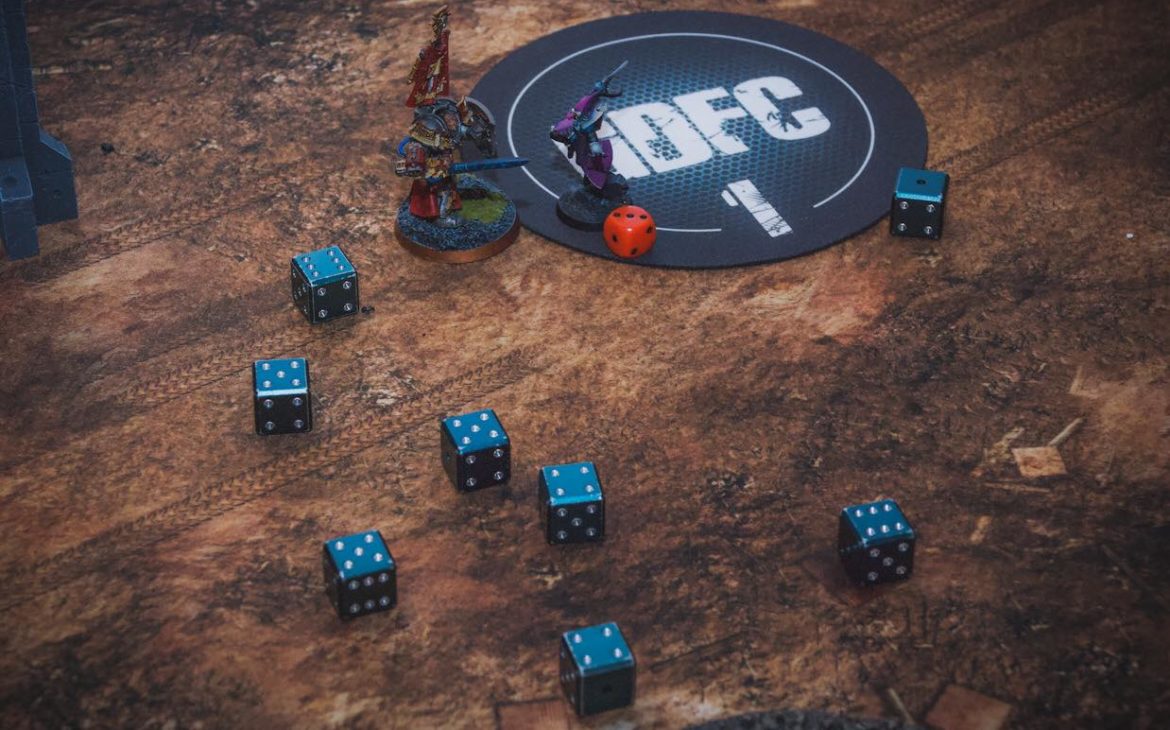
Deployment
Grey Knights: The Grey Knights deployed the Paladins, Purgation squad, Draigo, Stern, Apothecary, Chaplain, and the Librarian in the ruin within their deployment zone. Additionally, one of the Grand Masters in Nemesis Dreadknights was deployed on the table while the Warlord GMNDK, Interceptors, and 3 Strike Squads remained in deep strike. The GMNDK was deployed as far within the ruin as possible but within 8″ of the objective to give it as much protection as possible from the Aeldari firepower but still giving it a chance to grab the objective at the bottom of the turn.
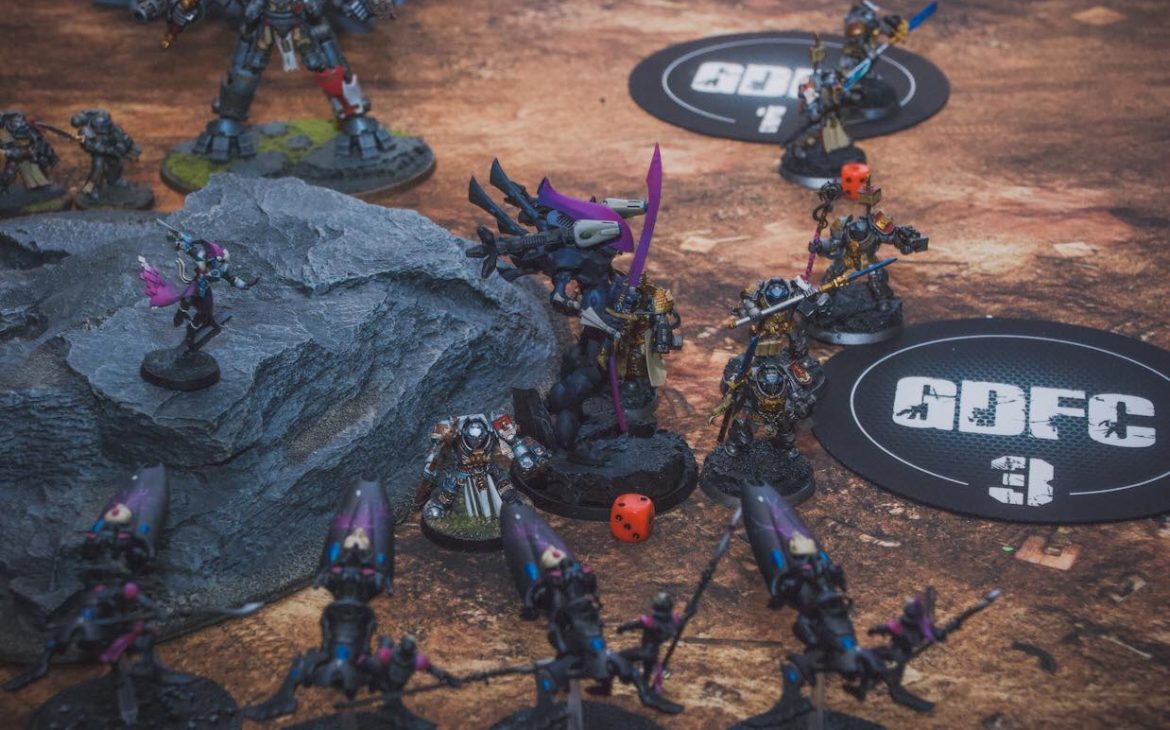
Aeldari: The Aeldari objective during deployment was to bring as much anti-LOS firepower to bear to take out a unit and perhaps start weakening the Paladin squad if possible. The GMNDK was positioned in a way that would draw Skyweavers within 24″ of the Paladins, thus exposing them to firepower, if we went for the bait. We also knew that it would be important to zone out as much as possible to protect ourselves from the potential Smite battery that awaits in deep strike. 1 squad of Rangers is left in reserves.
Battle Round 1
Grey Knights start in Tide of Shadows and Recitation of Projection is Inspiring.
Aeldari Turn 1:
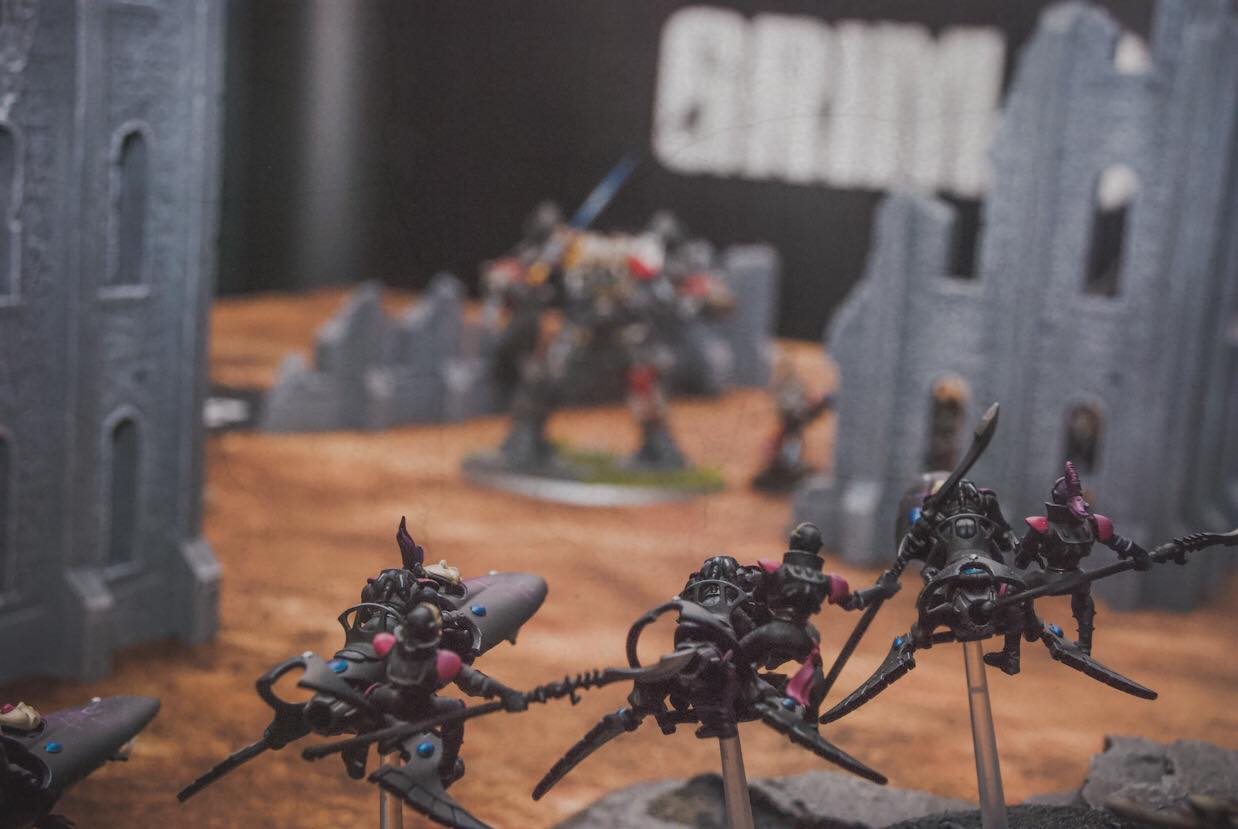
Movement: The Rangers in the south of the board move into the rocky formation to push out their screen and gain the benefit of cover. The Skyweavers also push out west so that each of them has range of the GMNDK, they advance and use a CP for Prismatic Blur to gain a 3++ invulnerable save. The Rangers in the north push out their screen and the Hornets with the Farseer push out to a position that provides them full coverage of the battlefield, lest the Grey Knights deep strike into their own deployment zone behind their ruin.
Psychic: Fortune is successfully cast on the Hornets and Guide is successfully cast on the northernmost the Night Spinner.
Shooting: The Skyweavers only manage 7 wounds on the GMNDK then Fire and Fade to the bottom of the board, behind the Rangers to protect them from Smites. The Rangers are able to add-on another mortal wound to the GMNDK and the Wraithlord is able to finish it off with its Starcannons. The combined shooting from the two Night Spinners and the two Wraithseers were able to pick up the Purgation squad and 2 Paladins.
Score: Hold, Kill, Gangbuster, and Headhunter
Grey Knights Turn 1:
Deciding to go second was a risky decision and the Aeldari were able to take out some significant offensive firepower in the Purgation squad, one GMNDK, and two Paladins. Losing the GMNDK is particularly painful as there’s no way to hold our objective without sacrificing a character as the Skyweavers are lurking about and would be able to snipe one out. Additionally, the only character with Gate of Infinity is the Apothecary and holding that objective to score Postman this turn might expose him, and we would risk losing him for the remainder of the battle. The game plan will be to find an opportunity to take and hold the middle to safely secure those two objectives then use Gate of Infinity onto the backfield objective as the last one to score all four points.
Movement: Grey Knights decide to hold tight with the majority of their units. They reshuffle their characters so that they have line of sight into the Rangers and Skyweavers but still leave the Paladins within the ruins closest to the enemy so that they cannot be targeted by Aeldari shooting unless the Skyweavers decide to overextend and come around to the rear of our deployment.
Psychic Phase: The character smite battery is able to wipe the Ranger squad, scoring a Kill. Astral Aim is successfully cast on the Paladins, Empyrean Domination gains 1 CP for the GK, Warp shaping changes the active Tide to Tide of Convergence. Sanctuary fails to cast on the Paladins, and Yvraine denies Armoured Resilience.
Shooting Phase: The Paladins use their psychic attunement to take aim at the Skyweavers with their Stormbolters and with the benefit of Draigo’s Chapter Master aura support, they are able to take remove two of the Aeldari bikes from the sky.
Score: Kill, Gang Buster
- Aeldari Score 6: Hold, Hold more, Kill, Kill more, Gang Buster, and Headhunter
- Grey Knigts Score 2: Kill, Gang Buster
Battle Round 2
Grey Knights Invocation of Focus is successfully inspiring the Paladins
Aeldari Turn 2:
A solid turn 1 was able to significantly reduce the Grey Knight’s overall damage output by removing the Purgation squad, a GMNDK, and a few Paladins. The bigger opportunity is to capitalize on Objective 2 that is now left wide open. A very interesting dilemma arises, do the Aeldari wait patiently or do they seize the opportunity to continue to apply more pressure …
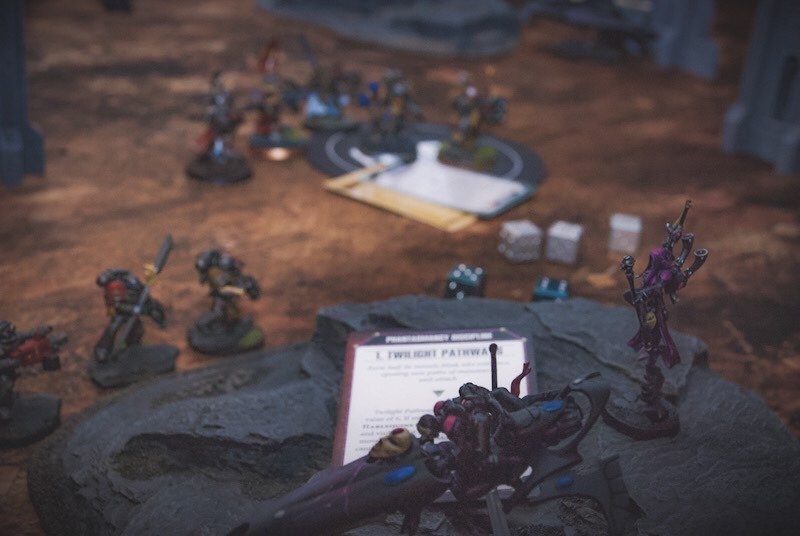
Movement: I’m typically a very patient player but I have been working on trying to play a bit more aggressive lately. I decided to go for it. I move the Wraithseer onto the center objective, which puts it within 14″ of the Paladins, giving them a tempting 9″ charge to get into Objective 1. I push the southern Wraithlord further west to expand the screen, and then move the Skyweavers back into the middle of my deployment zone more than 24″ away from where most things could drop, protecting them from GK firepower. I push the northern Rangers further north effectively zoning the rest of the northern quadrant of the board and effectively only allowing the GK a few spots to drop if they want to deep strike in … within range and view of the Hornets. Lastly, I deep strike my remaining squad of Rangers onto Objective 2 to claim the bonus point and a Recon point but also to deny the GK ability to Gate onto it with the Apothecary to start holding the objective and secure Postman points.
Psychic: Fortune and Guide are successfully cast onto the Hornets and Enliven is successfully cast onto the southern Wraithlord thus giving him some charge support should the Paladins decide to drop down.
Shooting: Shooting is ineffective. The deep striking Rangers are able to plink a MW off the Librarian and the combined shooting of two Wraithseers and two Night Spinners manage to bring down another Paladin.
Score: Hold, Bonus, Recon
Grey Knights Turn 2:
The Aeldari have baited the trap. If the Paladins move out and do not make the charge, they will be exposed to a lot of firepower. Alternatively, if we do not start moving out, the Aeldari might start walking away with a huge lead on the primary that it will be very difficult to claw back into the game …
Movement: There’s a split decision amongst the community on whether to hang back or to go for it. Ultimately, after measuring out some ranges, the Grey Knights decide to go for a big push. The Paladins leave the ruins and the characters move into the vacated space to lend some aura support. The other big movement here comes in the form of deep strikes. 1CP is spent to dynamically insert a Strike squad to secure the back objective from the Rangers. Grey Knights decide to risk it and the Warlord GMNDK comes down within 9″ of the Wraithseer and the southern Wraithlord. The Aeldari then spend 2CP to use Forewarned to shoot at the Warlord GMNDK, and manage 10 wounds, but it survives. The Interceptor squad also comes down, as well as the remaining 2 Strike squads just behind. This will effectively enable the GMNDK to lend his warlord trait First to the Fray to all of the surrounding units to try and ensure someone makes a charge in.
Psychic: The western Strike squad on objective 2 smites the Rangers to remove 2 models. The GMNDK, Interceptors, and 2 Strike Squads put 8 mortal wounds onto the southern Wraithlord, leaving it with 2 wounds remaining in the hopes to nail a 9″ charge into it. The Paladins smite the Wraithseer holding objective 1. Hammerhand is successfully cast onto the Paladin squad, Sanctuary is denied by Yvraine with her +1, and Armoured Resilience is also denied by a Wraithseer. Empyrean Domination is successfully cast to regain an additional CP and Warp Shaping is successfully cast, changing the current tide to the Tide of Convergence. Astral Aim is also cast onto the Paladins.
Shooting: The western Strike squad pours their fire into the remaining Rangers, wiping the squad and giving the Grey Knights complete control of objective 2. The southwest Strike squad puts their bolter shots into the Wraithseer holding objective 3 and the heavy weapon into the Wraithseer holding objective 1. Following their shooting, Grey Knights spend 2CP on Bring Down the Beast on the Wraithseer holding objective 3 to allow them to reroll failed wounds. The Paladins spend 2CP on Psybolt Ammunition and take out the southern Wraithseer holding objective 3 and netting a Big Game Hunter point. The Remaining Interceptors, Strike Squads, and GMNDK target the central Wraithseer holding objective 1 and bring it down to 4 wounds through all their shooting.
Charge: The Paladins roll a 10 for their charge range and are able to maximize the distance of the roll by stringing out to get a couple of Paladins closest to the southern Wraithlord. While it may not be enough initially to tag the Wraithlord, with some clever pile-in and consolidations, Grey Knights should be able to take Objective 3, and with any luck either tag, wrap, or take out the southern Wraithlord. The GMNDK, 2 Strike squads, and Interceptors all fail their charges, while the Strike squad also lost a model in overwatch.
Fight: With Hammerhand, the Paladins easily finish off the Wraithseer holding objective 1, and with cheeky pile-in and consolidation moves, they are basically able to conga-line to just outside of an inch of the Wraithlord. Grey Knights then spend 3CP for Honour the Chapter to fight again at the end of the Fight phase, to pile-in, fight with close combat weapons (str user ap – dmg 1) to not risk killing the Wraithlord, then consolidate and successfully wrap the Wraithlord. This also allows the Paladins to successfully place 2 models on objective 3, thus stealing it from the Aeldari and also provides them protection from the Aeldari firepower in the subsequent turn.
Score: Hold, Hold More, Kill, Kill More, Bonus, 2 Big Game Hunter points
- Aeldari Score 3 (9 total): Hold, Bonus, and Recon
- Grey Knights Score 7 (9 total) : Hold, Hold More, Kill, Kill More, Bonus, 2 Big Game Hunter
Battle Round 3
The Grey Knights were able to come back with a big turn 2, but are fully committed to the field. Do the Aeldari have enough firepower to take advantage of the opportunity …
Aeldari Turn 3:
Really solid turn for the Grey Knights. They took advantage of the opportunity (bait) and really committed to the field. The wrap on the Wraithlord really hampers my ability to deal with the Paladins, but with the Grey Knights fully committed to the field at this point, I have an opportunity to deal some significant damage to their army.
Movement: The Skyweavers move back out to the bottom of the board looking to contribute their Haywire shots and get a charge on the Paladins. The Solitaire uses her Blitz ability to position herself between the Paladins, the Interceptors and the Strike squads thus giving her some options as to where to charge. The Wraithlord moves out to toe objective 1 and prepares a charge on the Paladins. Yvraine moves up a level to get line of sight of the battlefield, ready to lend some psychic support. The Death Jester also moves up a level to lend some fire support The northern Rangers push out their screen and move into the rocky terrain while the Hornets reposition to get line of sight to all of the targets in the southwest corner of the board. The Farseer moves just out of deny range from the GK characters that are sitting in the ruin.
Psychic: The Grey Knights shut down the Aeldari psychic output. Yvraine attempts to cast a Smite and Gaze of Ynnead on the Paladins, but are denied. The Shadowseer also attempts Smite and Shards of Light on the Paladins but they are also denied. The Farseer does successfully cast Fortune and Guide on the Hornets.
Shooting: The Hornets open up into the Interceptors and are able to wipe the squad. This is a huge blow to the Grey Knights. The Night Spinners are able to take down one of the Strike squads, and the combined shooting of the Death Jesters, Shadowseer, Skyweavers, and Wraithlord remove the GMNDK and take 2 models from the remaining Strike squad. All in all, an impressive round of shooting from the Aeldari.
Charge: The Solitaire, Skyweavers, and Wraithlord successfully charge the Paladins.
Fight: The blitzed Solitaire kicks off the fight phase against the Paladins, taking out 3 of them with her Cegorach’s Rose. The flat 3 damage is huge and the Grey Knights decide to spend 2CP on Masters of Combat to allow them to fight on death as models are removed. The Solitaire then bases two of the Paladins in an attempt to protect the Skyweavers from their returning attacks to try and deny Gang Buster points. Before being removed from the battlefield, the first three Paladins fight against the northern Wraithlord, but the Wraithlord is able to save all of the attacks from the Paladins. Removing the northernmost Paladins disallows the Wraithlord an opportunity to fight back as he is no longer within 1″ of an enemy model (nor would he be even with a 3″ pile-in). The Skyweavers fight next taking down 3 more of the Paladins, who then pour their attacks into the wrapped Wraithlord and the Skyweavers, taking down the Wraithlord with their Halberds and staves and removing a wound from one of the Harlequin bikes. With 2 Paladins remaining, they pour their remaining attacks into the Solitaire, as they are not within 1″ of the Skyweavers. The Solitaire tanks the majority of the damage, but does take 2 wounds from one of the Paladins.
The Solitaire spends 3CP to use War Dancer allowing her to fight again and her precision with Cegorach’s Rose melts the inside of the remaining Paladins with monofilament. She then consolidates closer to the remaining Strike squad in an attempt to protect the Skyweavers from Smites.
Score: Hold, Kill, 3x Gang Buster, Headhunter
Grey Knights Turn 3:
Big turn for the Aeldari basically wiping everything but a Strike squad and all the GK characters off the table. Can the Grey Knight heroes avenge their fallen …
Movement: With the majority of the Grey Knight army decimated, the Grey Knights are focusing on accumulating as many points as possible. The Apothecary is the first to move out and advances safely onto Objective 1 to secure the first Postman point. The goal is to try and Gate or advance onto objective 3 before Gating back to Objective 2 to secure all 4 points. The rest of the Grey Knight characters decide to advance safely onto the objective to try and give them as much range into the Aeldari as possible. With a 9″ charge range to get into the Wraithlord, the safer play is to advance and deal with it via smites.
Psychic Phase: Sanctuary and Armoured Resilience is successfully cast onto the Apothecary (to try and keep him alive to secure Postman points). Warp Shaping changes the tide back to the Tide of Escalation, Empyrean Domination refunds a CP, and the remaining 4 characters attempt to smite the Wraithlord. The southwest Strike squad moves so that it’s equidistant to the Solitaire and the Wraithlord, and they smite off the Wraithlord thus netting their last Big Game Hunter point.
Shooting: The remaining Strike squad in the southwest corner pour their fire into the Skyweavers but are unable to score any wounds.
Score: Hold, Hold more, Kill, Big Game Hunter
- Aeldari Score 7 (16 Total): Hold, Kill, Kill more, 3x Gang Buster, 1 Headhunter
- Grey Knights Score 5 (14 total): Hold, Hold more, Kill, Big Game Hunter, Postman
Really good turn for the Aeldari and we now have the advantage in firepower. Grey Knights still have some very durable characters with powerful combat ability and Smite output. At this point, it’s just a matter of denying them points and securing as many as we can for ourselves.
Battle Round 4
Grey Knights Litany Invocation of Focus is inspiring on the Apothecary
Aeldari Turn 4:
Really good turn for the Aeldari and now we have the advantage in firepower and mobility. Grey Knights still have some very durable characters with powerful combat ability and Smite output.
Movement: The big goal here is to try and prevent the Grey Knights from getting onto objective 3 and see if we can’t secure objective 2 as well. Additionally, we need to try and take down the Grey Knight characters that all have good armor and invulnerable saves. The Apothecary is extremely durable right now and we don’t necessarily want to commit any of our melee units until we can remove a few more characters. The northern Rangers push the screen into the NW quadrant of the board to secure a Recon point and also protect the Hornets from Smites. Yvraine and the Death Jester move up a level. The Shadowseer advances into the SW corner of the board into the rocky terrain to secure a Recon point but to also slingshot the Skyweavers into the Strike squad on objective 2. The Skyweavers move towards objective 2 but it will be crucial for us to get Twilight Pathways off to get into the Strikes on objective 2. The Death Jester holding objective 3 moves to the southern tip of the objective, placing him about 19″ away from the Chaplain and thus out of charge range in the subsequent Grey Knights turn.
Psychic: Guide is successfully cast with a reroll from the Runes of the Farseer but Fortune does not go off. The Shadowseer attempts a Smite that is denied, Yvraine attempts to Smite and Gaze of Ynnead but both are denied as well. In what might be one of the crucial moments of the game, the Shadowseer casts Twilight Pathways on the Skyweavers and is successfully manifested on a 7, rolling a 6 and a 1. Not wanting to be denied, I spend my last CP to reroll the 1 into 5. However, the Grey Knights spend their last 2CP on the Aegis allowing them to roll 3D6 and select the 2 highest for their deny roll. The Grey Knights end up rolling a 5, 4, 3. Even with the Librarian’s Artisan Nullifier Matrix raising the result by one, the Aeldari successfully cast Twilight Pathways on an 11 vs. 11( 5 + 4 + 1(brotherhood) + 1(ANM)), allowing the Skyweavers to move within 2″ of the Strikes on objective 2.
Shooting: The Skyweavers are able to get into the Strikes and remove 2 of their number with their Haywire shots. The Rangers, Night Spinners, and 1 Death Jester are only able to manage 2 wounds on the Librarian but the last remaining Death Jester takes aim and unleashes a round of Shuriken into the Librarian rolling double 6’s for the wound rolls and is able to remove the last wound. The Hornets take aim and blast Stern off the table with their pulse lasers.
Charge Phase: The Skyweavers make their 2″ charge into the Strikes
Fight Phase: The Skyweavers cut down the remaining 3 Strike marines holding objective 3 with their Zephyrglaives
Score: Hold, Kill, 2 Headhunter, 1 Recon
Grey Knights Turn 4:
Well it’s looking pretty grim for the Grey Knights at this point. Clever movement from the Aeldari puts Objective 3 out of reach. Unable to advance, Gate, or charge our way onto Objective 3, and the Skyweavers have also secured objective 2, it looks like the Postman points are out of reach for us. Even still, we will try and finish the game strong.
Movement: The Chaplain and the Apothecary advance as far as possible towards objective 3 but are still out of range. Draigo holds objective 1 in an attempt to get the bonus next turn.
Psychic: Draigo successfully casts Sanctuary onto the Apothecary. However, to add insult to injury, the Smites from Draigo, the Apothecary, and the Chaplain are all denied.
Shooting: Draigo takes a few potshots at the Skyweavers to try and net another Gang Buster point, but no wounds go through.
Score: Hold
- Aeldari Score 7 (23 total): Hold, Hold more, Kill, Kill more, 2 Headhunter (maxed), 1 Recon
- Grey Knights Score 1 (15 total): Hold
Battle Round 5
Aeldari Turn 5:
Movement: In anticipation for an epic showdown, the Soltaire moves in on Draigo and everyone else essentially stands still.
Psychic: Guide successfully goes off onto the Hornets. The Farseer, Shadowseer, and Yvraine are able to use their Smites and targeted Smites to remove the Chaplain.
Shooting: The Hornets are able to pick-up the Apothecary
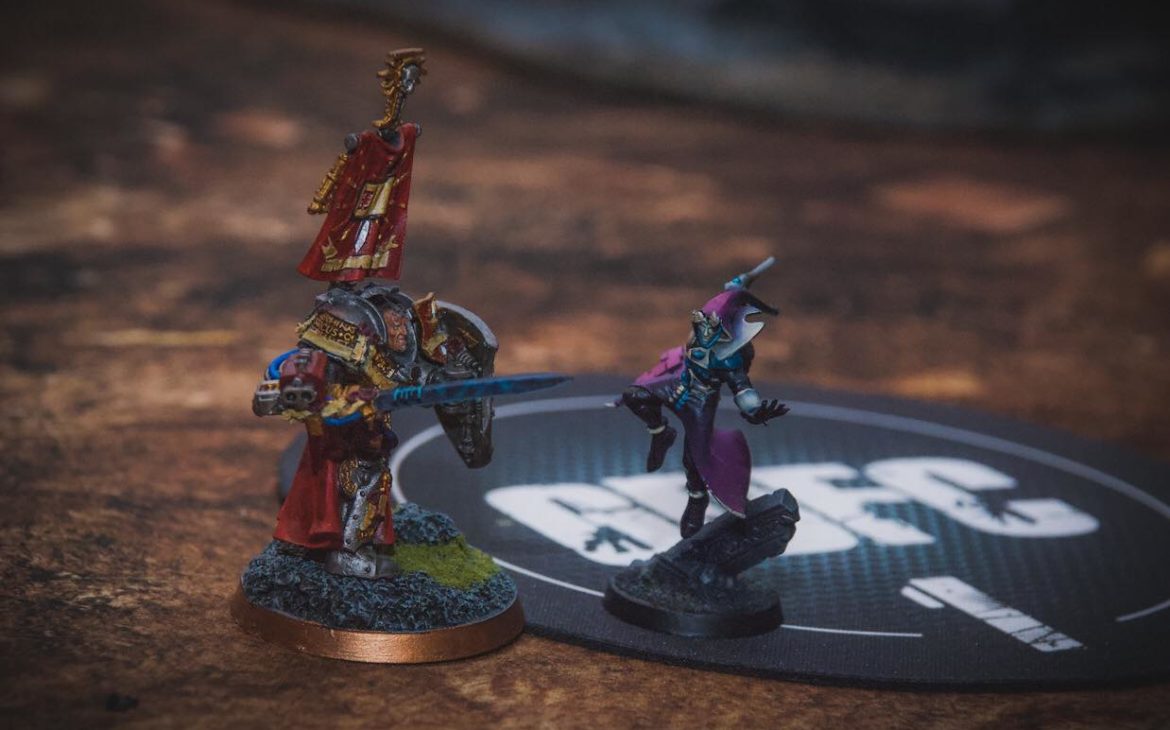
Charge: The Solitaire with 3 remaining wounds successfully charges into the Dragio
Fight: (see below)
Score: Hold, Hold more, Kill, Kill more, Bonus, Recon
- Aeldari Score 6 (29 total): Hold, Hold more, Kill, Kill more, Bonus, Recon
- Grey Knights Score 0 (15 total):
Aeldari Victory: 33 – 15
- Aeldari 4 Remaining Points: Hold, Hold more, bonus, Recon

The After Action Report
Game Defining Moments
Aeldari
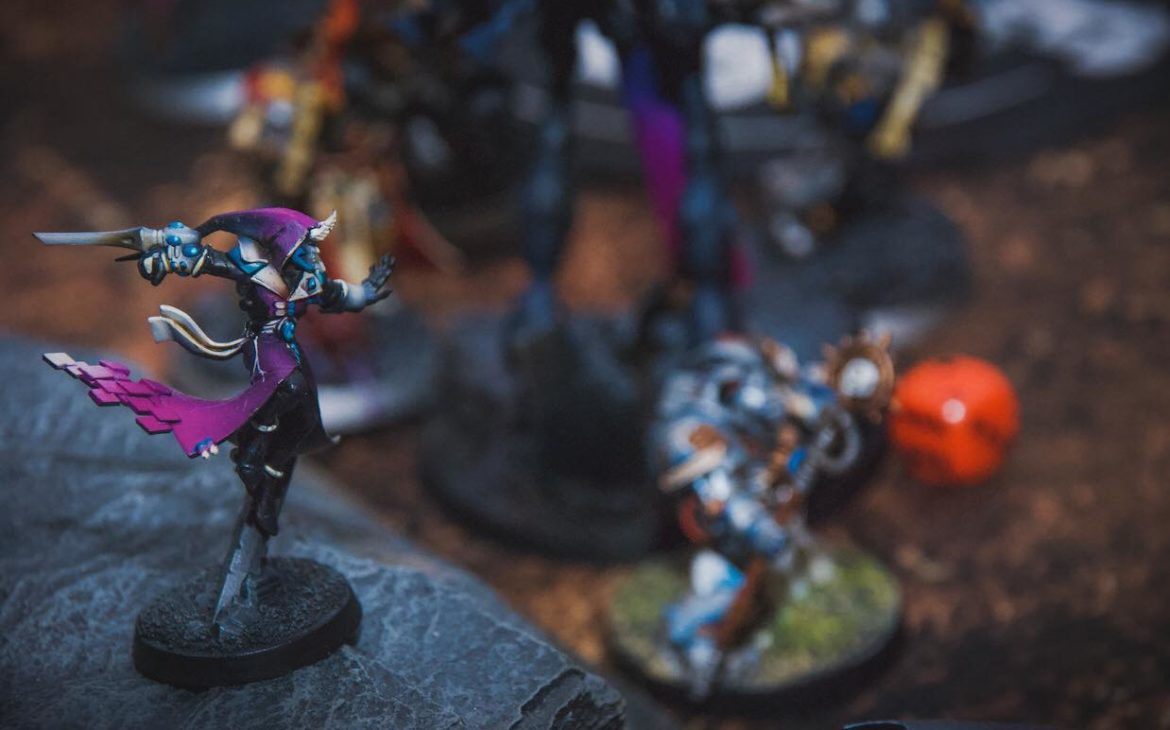
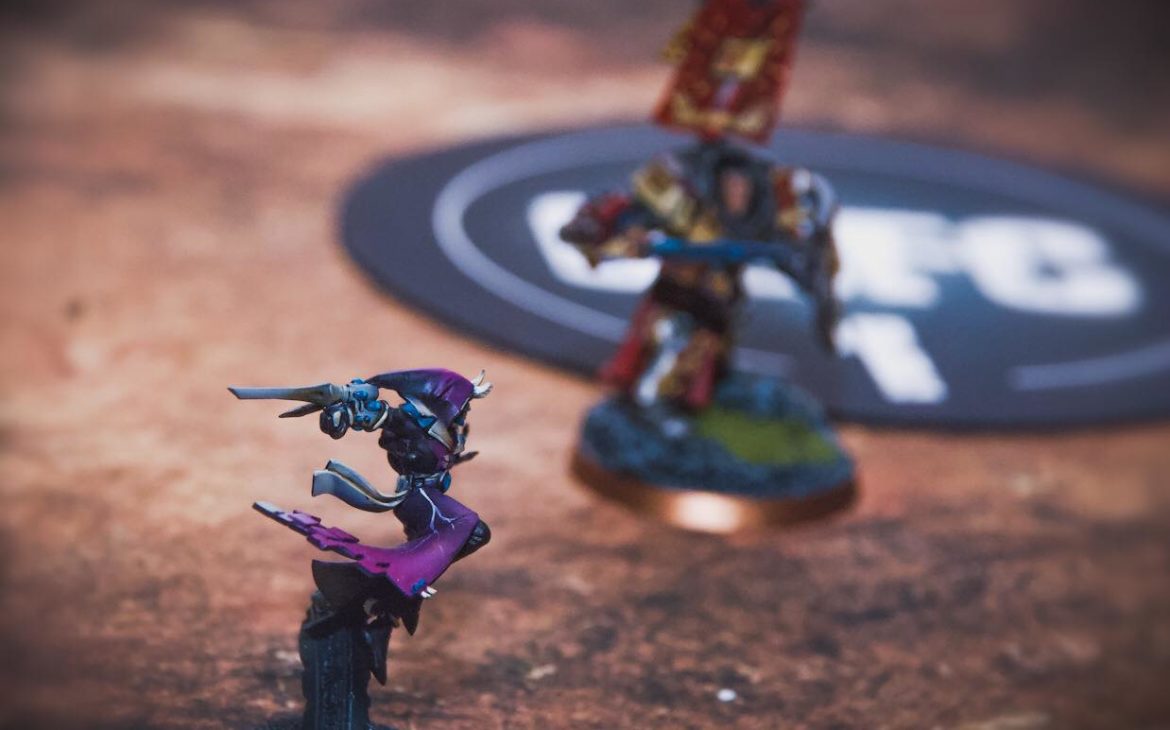
How cool was it that the Solitaire had an opportunity to go head-to-head with the Supreme Grand Master himself?
That moment aside, I think the defining moment was baiting the Paladins from the ruin and forcing them into a difficult decision to commit to the field. Grey Knights are still a glass cannon type of army and by keeping my firepower screened and protected from their Smites, I was able to significantly reduce their damage output and ultimately win the game by keeping out of reach from their big damage dealers.
Grey Knights
Nailing the charge against the Wraithseer with the Paladins and getting the wrap off against the Wraithlord using Honour the Chapter. This could also be considered a negative as well, as ultimately, I think that committing to the field too soon without whittling some of the Aeldari firepower, really left the Grey Knights exposed and ultimately cost us the game.
MVPs
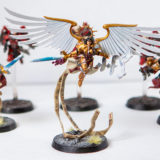
Aeldari
Tough one here between the Hornets and the Solitaire. I’ll go ahead and give it to the Solitaire, who usually doesn’t do all that much for me. This game, she went off, killing 6ish Paladins, and Draigo. That Rose is so good against infantry and the fact that it wounds most things on 4s with re-rolls is great as she doesn’t necessarily care about Trans-human in this case. The Hornets did a great deal of damage all game and I’m excited to keep testing them.
Grey Knights
Hard to say, a lot of our units were forced to do things they don’t usually like to do, or forced to do them sooner than we would like. Paladins, always do work and were probably the most engaged throughout the game. However, we didn’t get much support as the Purgation squad was eliminated early on, the GMNDKs were rendered pretty much useless, and the Strikes and Interceptors did a little work, but were swiftly delt with in the subsequent turn.

Takeaways and Lessons Learned
Aeldari
Starting from a list perspective, I was impressed with how the list performed. It has a lot of the elements and tools that I really value. I am concerned with the list’s ability to handle say … 90 – 120 Boyz / Gaunts / etc. but this list seems to give the Aeldari a good fighting shot against Space Marines or other more elite types of armies.
I think people are still trying to figure Grey Knights out. Grey Knights do have some big weaknesses that savvy generals can exploit, namely their lack of range, their durability, and limited ground mobility.
Grey Knights really want to reduce your output without leaving the safety of their cover, and if you are able to put pressure on them by reducing their numbers by outranging them or beating them at their own game, you’re going to force the Grey Knights to act before they want to act. Keeping your screens up is important to keeping your key elements protected from all that Smite damage. As you saw, they were capable of absolutely eating up 3 toughness 8 Wraiths in a turn with a combination of their psychic, shooting, and melee damage potential.
If you are able to force their hand and make the Strikes and other elements commit to the field and limit their damage output by forcing their Smites onto screens, you are in a great position to really hurt them in the following turn.
Screens are also important to limit their mobility. Grey Knights greatest mobility options are Gate of Infinity and deep striking. If you are able to force them to move where you want them to move, you are giving yourself a great chance to succeed.
Grey Knights
The biggest lesson learned and takeaway here is to continue to be patient. The better play instead of falling for the trap would have been to clear all the screens before committing to the field. By clearing the northern Ranger squad, that would have given us an opportunity to deploy deep striking units to clear the Hornets, which were ultimately the biggest threat. Alternatively, perhaps even at deployment, Jon Kilcullen suggested we could have baited the Skyweavers by deploying the GMNDK deeper into our deployment zone, to really pull the Skyweavers into range if they wanted to eliminate the GMNDK. Even though we were trying to protect it, ultimately, this kept the SKyweavers in range of the Shadowseer to be able to slingshot it later in the game. In this case, trading the GMNDK for the Skyweavers would have severely reduced the Aeldari’s mobility and allowed us to control the board more effectively.
Closing Thoughts
Hope you enjoyed this GW “Remote Hammer” battle report. We would love to hear your thoughts so please leave us a comment down below. We hope to resume our video content as soon as we can, but for now, we’re doing our part to promote social distancing and keeping our communities, families, and loved ones healthy.
If you’re interested in joining our Discord community, feel free to reach out to us at grimdarkfilthycasuals@gmail.com and please follow us on the usual platforms to stay up-to-date with all of the latest releases from GDFC.
- Twitter: @GDFilthyCasuals
- Instagram: grimdarkfilthycasuals
- Facebook: grimdarkfilthycasuals
- Youtube: GDFC Youtube Channel

is the founder of Grim Dark Filthy Casuals, Assistant to the Editor in Chief, Author, Content Director, Resident Emo Aeldari Player, and Chief Filthy Casual

Charles Lowry
Great battle report. GDFC content has been very good overall and this report is no exception. I am a long time Eldar player and have been running a build somewhat similar to yours (Craftworld/Harlequin detachments). I find the Wraithlords to be particularly intriguing in your list primarily how aggressive they are points costed/cool aesthetic (drop my Airwing and determine what gains/losses through the exchange).
It was good to see the mortal wound abilities were negated by Grey Knights ( I have not played against them yet). Those abilities from the Farseer, Yvraine, and Shadowseer are clutch in my army design and would significantly hinder my army with their loss. Definitely good food for thought.
What are your thoughts regarding Craftworld traits? I eventually dropped Masters of Concealment as I faced multiple armies that could ignore cover. I am extremely fond of Expert Crafters as a defacto trait.
Thanks for the quality content and look forward to more in the future.
Brian Moy
Hi Charles,
Thank you for the encouragement and kind worlds. Grey Knights really shut down my psychic abilities for the most part of the game. Having the targetable Smites is usually huge for me in most matchups but against Grey Knights I consider it a cherry on top if any damage goes through in the psychic phase.
The Wraithlords fill an interesting role in the list, they provide fire support but also close combat punch or deterrent. I am fond of having 4 big T8 models that can all put out 4 Str 9 Dmg D6 hits in melee to give me some punch to protect the firebase if something mean gets into it. Additionally, the Solitaire, as well as targetable Smites also help in this department as a counter assault element to Smash Captains for example.
As for Craftworld Traits, I think it really depends on what units you’re going for and what their role is. Experts is probably one of the best traits we have, Masterful Shots is great on Night Spinners to remove cover as they will usually be shooting at things in ruins or magic boxes.
However, in this list, I find that having a 2+ save on Wraiths is big. Sure many armies can ignore cover, but not every army can. For even more goofiness, I’ve used Experts/Masters of Concealment with the Wraithhost detachment on a dual HWC Wraithknight. 2+/4++/5+++(fortune) makes this thing incredibly durable and it can be a bully all game with its shooting and 15 stomp attacks.
A combination of Experts/Masters of Concealment/Masterful Shots are usually what I’ve been leaning into these days. Though other options definitely exist, if you want to lean into Shining Spears or Dire Avengers for example.
-Bmoy