

Competitive 2,000 Point ITC Match: Aeldari vs. Space Wolves

Overview
Overview: 2,000 point Competitive ITC Match playtesting new Chapter Approved 2019 points.
Location: Good Games in the Sheffield neighborhood of Chicago | 1145 W Webster Ave, Chicago, IL 60614
Located right next to De Paul University, Good Games is an excellent place to catch a game of Warhammer. Friendly staff, a competitive and narrative scene, and beautiful terrain painted by the store’s manager, Craig Marney, ensure good games of 40K. https://www.goodgamesna.com/us/stores/illinois/chicago.html
Objective: Brian and Brian wanted to test out some tweaks to our ITC “competitive” lists with the new Chapter Approved points adjustments. We had fun testing some new aspects of our lists and have much to unpack. Hope you enjoy reading some of the details of our matchup with takeaways, lessons learned, and valuable units at the end of the report.
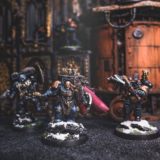
The Armies

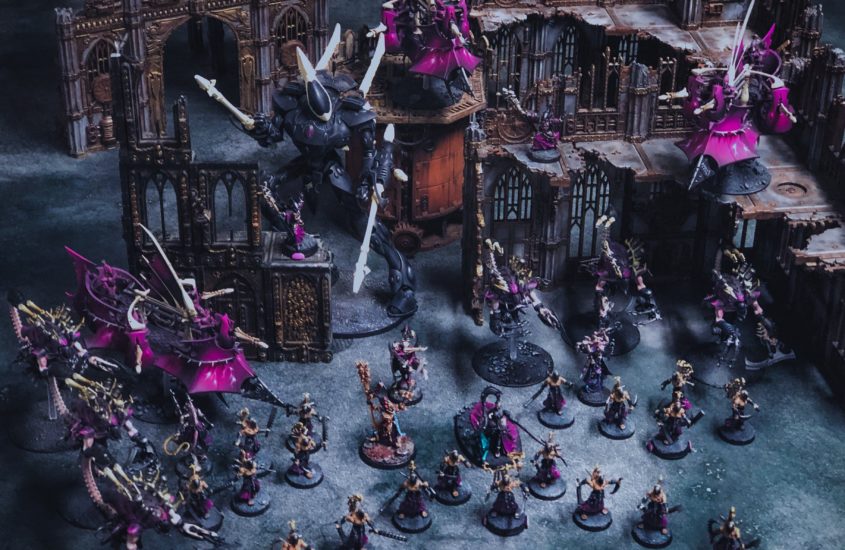
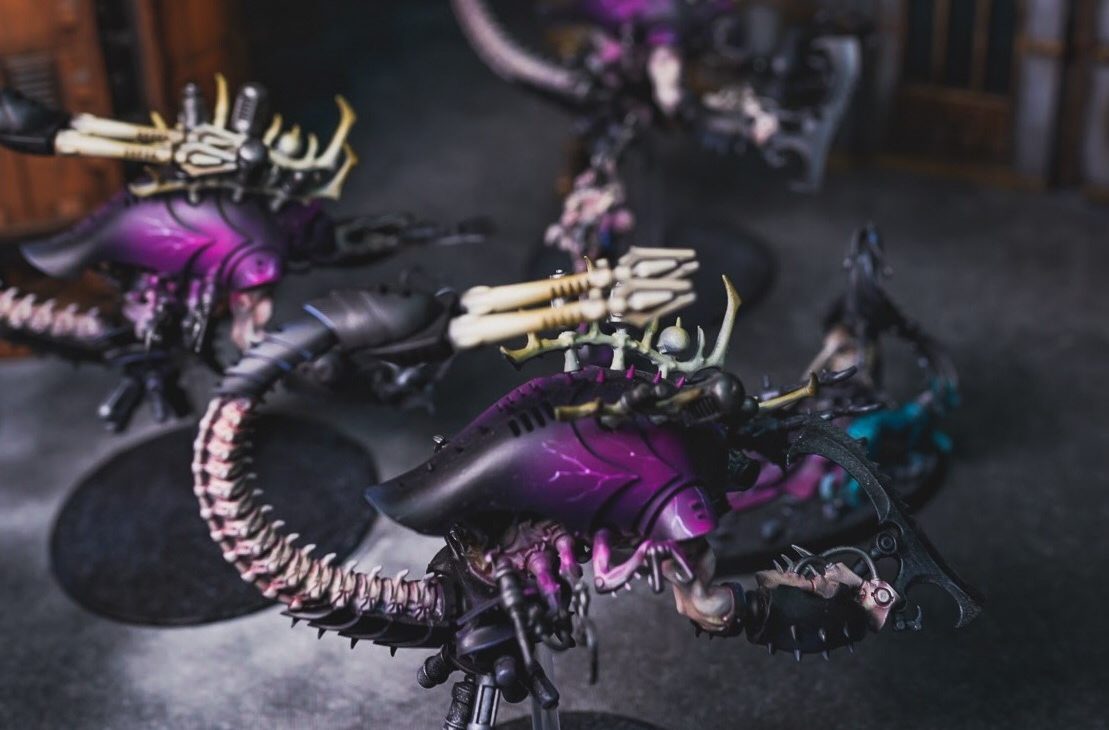
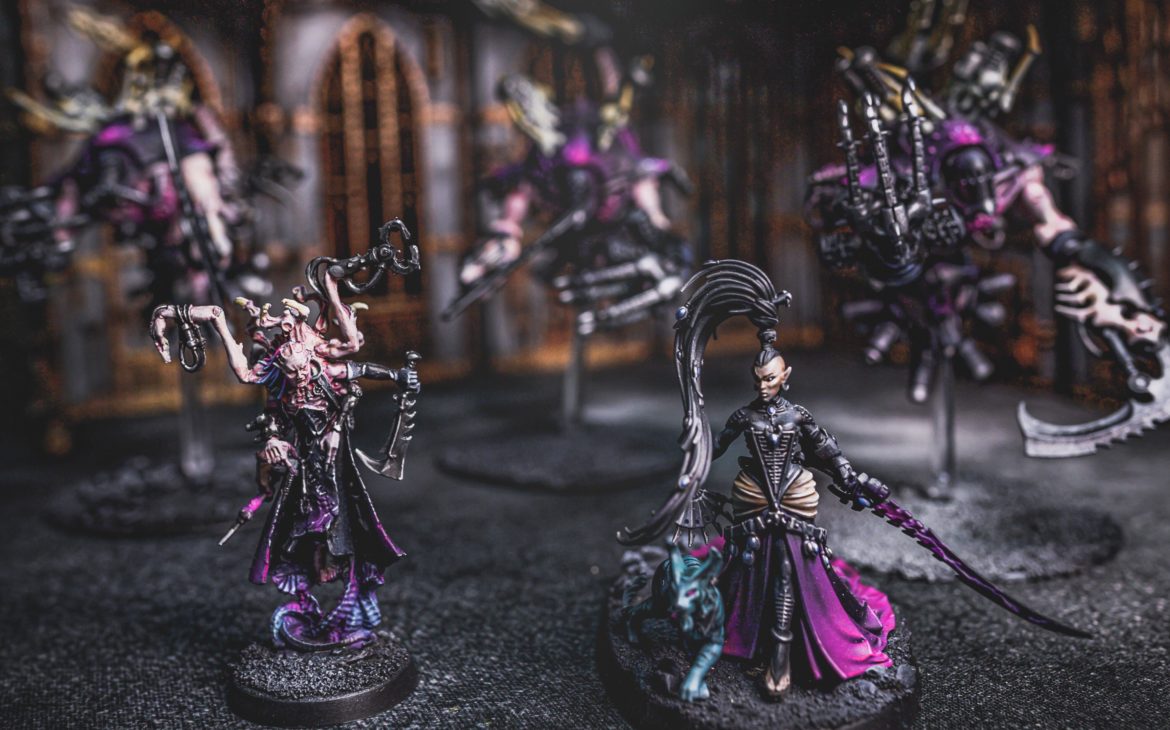
2,000 Point Aeldari: 16 drops, 10CP (-3CP)
Brian Moy Commentary: My typical competitive list consists of the POF Battalion, triple ravager spearhead, and a Harlequin’s Soaring Spite Vanguard with 6 Skyweavers, Shadowseer, 2x Death Jesters, and a Solitaire. I’ve been tinkering with the idea of trying to make a Wraithknight work again. The list essentially works with high toughness everything that doesn’t necessarily care about -AP modifiers. I tend to have a monster castle that tries to establish board control behind the Wraithknight being flanked by two unit of two talos. Behind it is the vexator mask Haemonculus which essentially creates a dangerous situation for any melee super units (such as Wulfen) to try and charge into. Ravagers act as backfield gunline, while Wraithknight and Talos are able to threaten just about anything as they derp around the field.
Prophets of Flesh Battalion: 923 points, 8 drops, 8CP (-1CP Prize from the Dark City)
- HQ: Haemonculus w/ Agonizer, Splinter pistol. Warlord Trait: Diabolical SoothSayer. Relic: Vexator Mask
- HQ: Urien Rakarth
- Troops: 1 x 8 Wracks, 1 x 1 Acothyst
- Troops: 2 x 4 Wracks, 2 x 1 Acothyst
- Heavy Support: 2 x 3 Talos, Haywire blasters, Macro Scalpels, and Chain Flails
Flayed Skull Spearhead: 482 points, 4 drops, 1CP (-1CP Alliance of Agony)
- HQ: Archon w/ Huskblade, Splinter pistol. Warlord Trait: Famed Savagery. Relic: The Djin Blade. Warlord.
- Heavy Support: 3 Ravagers w/ 3 Disintegrator Cannons, 1 Ravager with Shock Prow
Custom Craftworld (Masters of Concealment and Expert Crafters) Supreme Command: 595 points, 4 drops, 1CP, -1CP Wraith host Specialist Detachment)
- HQ: Farseer w/ Shuriken pistol, Witchblade. Spells: Smite, Executioner, Mind war.
- HQ: Spiritseer w/ Shuriken pistol, Witchstaff. Spells: Fateful Divergence, Quicken/Restrain
- HQ: Warlock w/ Shuriken pistol, Witchblade. Spells: Ghostwalk, Embolden/Horrify
- Lord of War: Wraithknight w/ 2x Heavy Wraithcannon

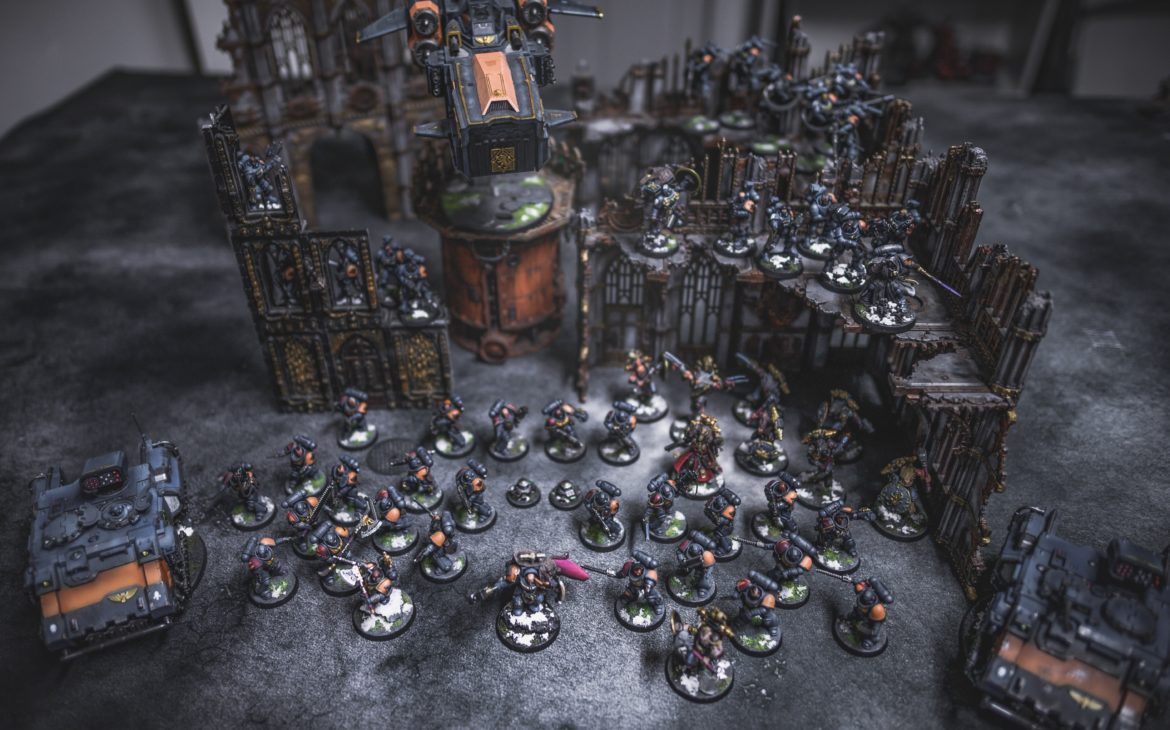
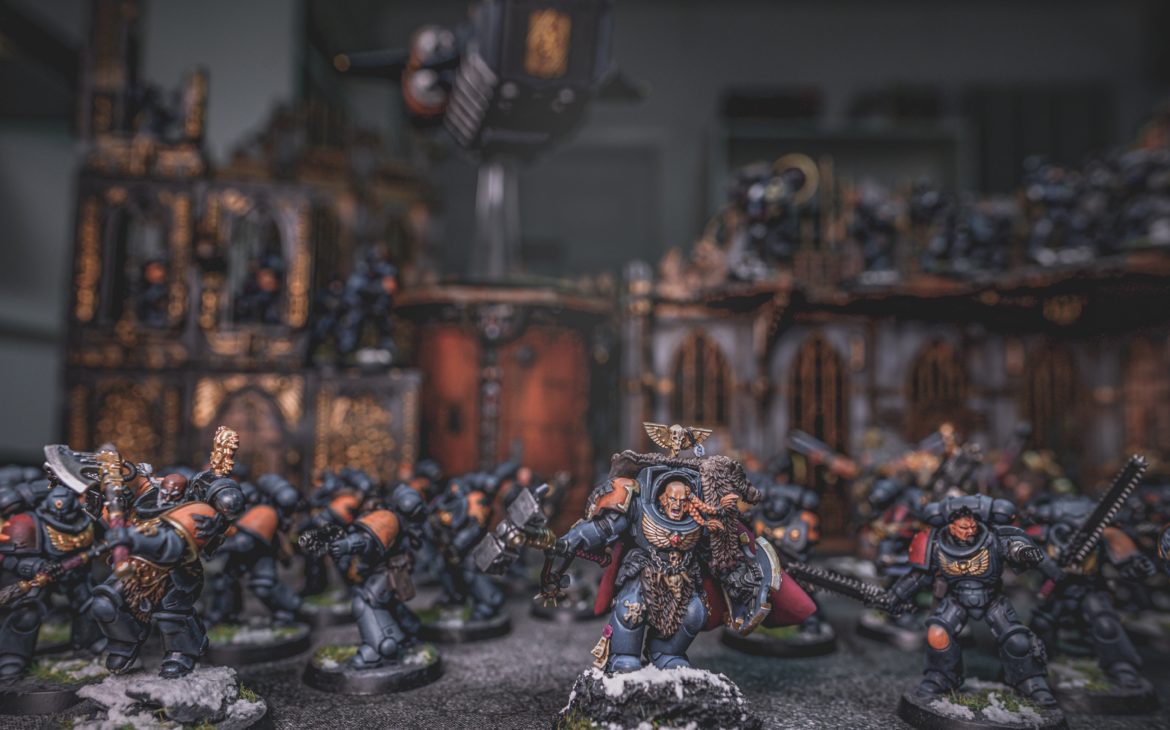
1,999 Point Space Wolves: 16/13 Drops, 13CP (-1CP)
Brian Tabata Commentary: List Design: The list is designed with the patient hunter in mind. Playing all out offense will lose to armies that do it better, which is every other space marine in the meta right now. I can play objectives well and can react to an opponents moves with the impulsors and outflanking units. The list is designed to pummel the opposing army from 48″ to force them to move around the board. This opens opportunities to hit them from behind with bloodclaws or bring them closer to within threat range of the wulfen. The wulfen normally dominate a ruin or a large LOS blocking feature on the map. If terrain is sparse they can threaten from a flank or utilize the stormwolf. The bloodclaws are a back up in this case the wulfen need to deepstrike charge and fail. I can setup a rerollable 3D6 charge taking the two highest using the stalker pack stratagem, battle leader, and wulfen aura. The list is abut denying points early, and then hitting hard with a coordinated strike.
Space Wolves Battalion: 545 points, 5 drops, 8CP
- HQ: Wolf Lord w/ Thunder hammer, Storm shield. Warlord trait: Saga of the Beastslayer. Relic: Wulfen Stone. Warlord
- HQ: Phobos Rune Priest, Temporal Corridor, Shrouding
- Troops: 1 x 5 Intercessor Squad w/ Stalker bolt rifles, chainsword, auxiliary grenade launcher
- Troops: 2 x 5 Incursor Squad w/ haywire mine
Space Wolves Battalion: 1,454 points, 11 Drops (-3), 5CP (-1CP Stalker Pack Specialist Detachment)
- HQ: Primary Battle Leader w/ Power axe, assault carbine
- HQ: Primaris Wolf Priest
- Elite: 1 x 5 Wulfen w/ Thunder hammer and Storm shields, 2x Frost claws, 1x Great frost axe
- Troops: 2 x 5 Intercessor Squad w/ Bolt rifles, Power fist, auxiliary grenade launcher
- Troops: 1 x 9 Bloodclaws, w/ 1 power axe, Wolfguard terminator w/ Thunder hammer, Storm shield
- Fast Attack: 2 x 3 Suppressor Squad
- Flyer: Storm Wolf w/ 2x Twin Heavy Bolter, 2x Lascannon, Twin Frostcannon
- Dedicated Transport: 2xImpulsors w/ 2x Storm bolters, 1x Belicatus missle launchers
Mission
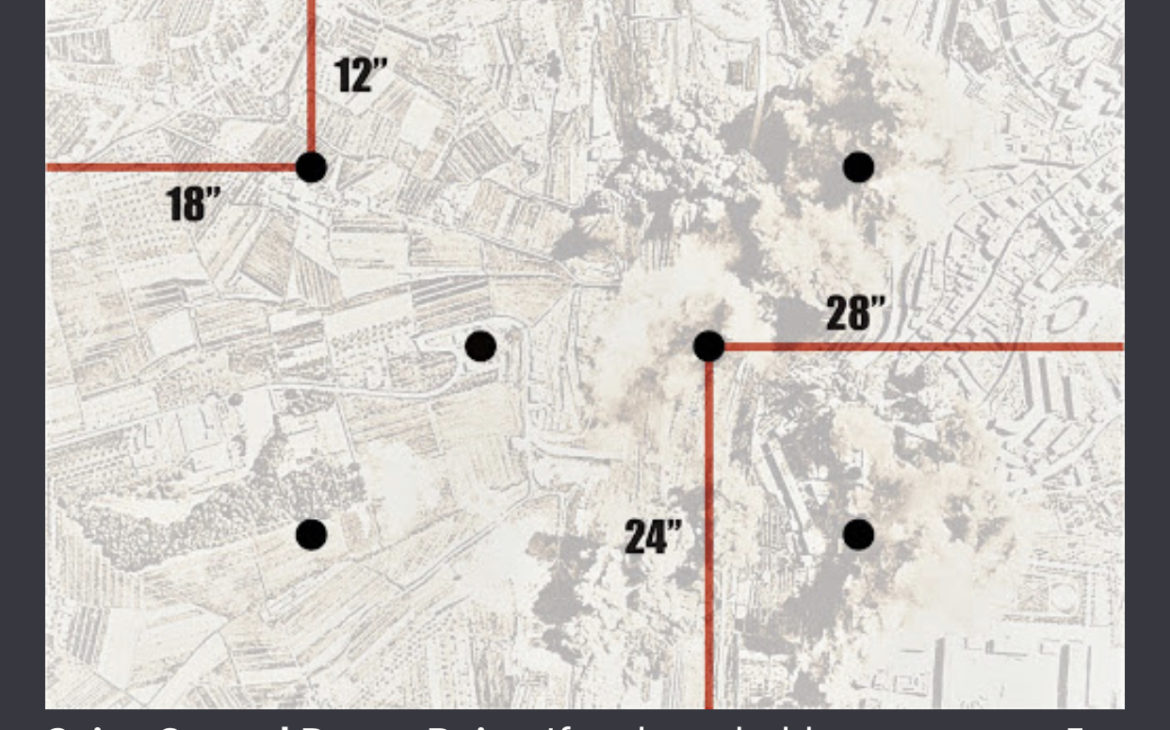
ITC Mission 1: Seize Ground
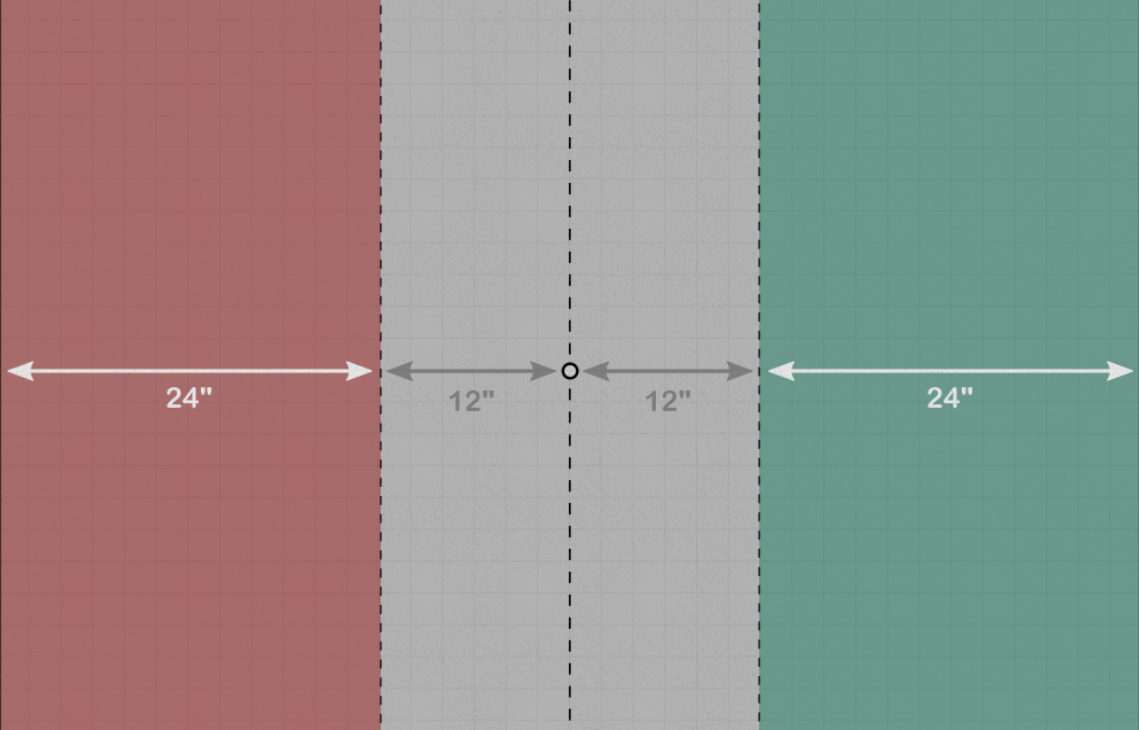
Deployment 4: Hammer and Anvil
Aeldari Secondaries: Big Game Hunter, The Butcher’s Bill, Head Hunter
Brian Moy Commentary: Brian’s (Tabata) list makes it difficult to chose secondaries against. BGH, I knew I could easily take out the targets that would give up 3 points. Butcher’s, Brian has a number of MSU with his armor, and my list is capable of taking out multiple units per turn. Head Hunter, this is always a dicey one. I typically choose a board control secondary, but with Head Hunter (and Mind War/Embolden/Horrify) I was hoping to nullify some of the impact that Brian’s characters would have on the game. Truthfully, I should have picked Engineers but wanted to see how he’d play his characters if I went Head Hunter.
Space Wolves Secondaries: Gang Busters, Recon, Engineer
Brian Tabata Commentary: Gangbusters: I picked gangbusters since I knew his talos would be pushing up, and key to him holding center objectives. I could also achieve the full 4 pts by nearly killing two full units. Engineers: this was an easy pick as his list has trouble dealing with units in magic boxes, and there happened to be one within 3″ of a point. Recon: I was worried about taking another kill secondary vs the eldar, since downing Ravagers, Talos, and a Wraithknight being buffed would be a tall order. My plan was to get the ravagers down to remove his long range threat to marines, and use some outflanking squads to sit out of danger and steal his home objectives.
Deployment
With Hammer and Anvil Deployment, both players deployed conservatively and played a cat and mouse game measuring threat ranges. Aeldari, deployed toward the West (red) of the board with the Space Wolves deploying the the East (green). In opposite table quarters, the NE and SW quadrants, two “magic boxes” existed that would allow infantry some protection as neither army had indirect fire. Both Brian’s have been known for playing a more patient style of play. Space Wolves finished deploying first and won the roll-off. Space Wolves decided to go second yielding the first turn to the Aeldari.
Brian Tabata Commentary: With us rolling hammer and anvil, I knew I could outrange most of his army and force the Aeldari to move to me. There was a large central ruin that I could hide my wulfen in and zone the center two objectives. I deployed wulfen int he stormwolf to avoid telegraphing this move, and hopefully baiting my opponent to move towards it to find range. Meanwhile I deployed my impulsors and supressors in such a way that turn one I could move and castle up in the other corner that had LOS to targets that would be approaching to shoot the stormwolf. Two units were outflanked to help me score recon and threaten has back objectives as he pushed his units out towards my deployment zone.
Pregame: Space Wolves spend 2CP to outlfank Blood Claws and an Intercessor Squad.
Battle Round 1
Aeldari Turn 1:
Movement: Fighting for seconds. Not something that one commonly wants, but against Brian, and our playstyles, second tends to be advantageous as it allows us to respond to the board state. I moved my Wraithknight/Talos wrecking ball formation out towards the midfield trying to bait out his Wulfen, but to also establish board control. The Wrecking ball consists of the Wraithknight being flanked by a squad of two Talos on each side with the Vexator mask Haemonculus behind the Wraithknight. This formation, means that no matter what charges in, it will be impacted by the Vexator mask, thus allowing the Talos and/or Wraithknight a chance to do major damage first. Brian deployed everything out of line of sight, or on the boardedge so the only unit in my army that would have an oppotunity to shoot would be the Wraithknight. I move my 9 man squad of wracks onto the central objective and hold 3 this turn.
Psychic: Fortune on the Wraithknight. Fateful Divergence on the Wraithknight. Ghostwalk on the Wraithknight. The Warlock Perils on a 1 and 1. I spend a CP and the re-roll is a 1 again … Lock takes 2 mortals. Perfect start.
Shooting: Wraithknight puts 6 wounds onto the Storm Wolf.
/Aeldari Turn 1. Score 1 for hold.
Space Wolves Turn 1:
Movement: Conservative movement for the Vylka Fenryka. The Wulfen disembark from the Storm Wolf and move into a ruin about 1/3 of the way up the board where the engineers are holding one of the objectives. I move the Storm Wolf onto the the middle objective closest to me, to make sure we will hold the same amount. I can’t stop the Wraithknight from shooting it next turn, so I figured it was the best unit for the job. I do my best to keep as much infantry hidden as possible, expecting a nasty counterattack from the Ravagers. I want to limit his ability to score Butcher’s Bill early.
Psychic: The Rune Priest casts shrouding on himself just so I could use cloaked by the storm, to give my firebase of impulsors and supressors a -1 to hit bubble.
Shooting: Storm Wolf opens to put a number of wounds into a Talos, but manages to do no wounds. With it now being unlikely to kill the Talos squad or 10 man wrack squad, the suppressor pack leaders pop smoke while managing to put a few wounds into the talos with the help of the Impulsors as well.
/Space Wolves Turn 1. Score 1 for hold.
Battle Round 2
Aeldari Turn 2:
Movement: As most of my army was already in solid position. I moved my pskyers around to try and get Mind War off on the Wolf Priest but out of deny range of the Rune Priest. The Ravagers moved within range to get LOS on some Impulsors, Storm Wolf, and perhaps a squad of Suppressors. Due to the range, I’m spread pretty thin and there is not really a way to zone out the board effectively.
Brian Moy Commentary: One alternative at this point is to focus on zoning but not Butcher’s to ensure that everything has to fall in front of me. I didn’t do that and you’ll see how I pay for it next turn. We’ll count this as a GDFup on my part.
Psychic: Fateful Divergence on the Wraithknight. Lock casts Embolden on the Farseer. Fortune successfully casts on the Wraithknight, and Mind War successfuly casts on the Rune Priest delivering 1 wound.
Shooting: The Wraithknight opens on an Impulsor taking off 5 wounds. The Talos put all their haywire shots into some Wulfen, taking down 1 perhaps. it takes all three Ravagers to finish off the Storm Wolf.
/Aeldari Turn 2. Score 3 for Hold, Kill, and Big Game Hunter.
Space Wolves Turn 2:
Movement: A Ravager had moved up the try and threaten the Space Wolves firebase, so the mission was to eliminate it with autocannon and missle launcher fire. The Space Wolves needed to regain control of the middle objective, so an Intercessor squad moved up and out of an Impulsor to grab it. The Wolves looked to start scoring recon, and had an opportunity to gain hold more if they could steal one of the Aeldari objectives. Bloodclaws deepstrike in to threathen a magic box with a squad of 5 Wracks holding the south west objective and an Intercessor squad deeps strikes in on the opposite side to threaten another 5 Wracks holding the north west objective. It’s a risky play, but the plan is to put all of the firepower to down 1 Ravager, and with the positioning, it will be hard for the Aeldari to remove both squads unless he wants to commit his Talos backwards. At worst, the Space Wolves will start collecting recon and force attention away from the Intercessors in the middle, which can steal the second objective in the middle next turn as well. With a little luck they can also steal an objective.
Psychic: Temporal corridor is cast to move the Rune Priest to support the Wulfen should the Aeldari try to make a long charge into the ruins against my Wulfen. The Space Wolves hope to use threat saturation to keep Supressors alive, so forgo any use of cloaked by the storm as they are running low on CP and need to save it for Honor the Chapter/Only in Death Does Duty End.
Shooting: Suppressors and Impulsors remove a Ravager.
Charge: Intercessors fail a charge on the NW Wracks but the Bloodclaws make it into the magic box on a 9″ charge. The Wolf Guard Terminator Veteran inches towards the Ravager as well. With pile in moves he will be able to swing at it since it was also declared as part of the charge.
Fight: Bloodclaws are able to wipe the Wrack Squad and the Wolf Guard Terminator with the TH/SS is able to put a number of wounds on a Ravager (that is at -1 to hit for Lightning Fast Reactions). Space Wolves wisely choose to fight again, and are able to take out the Ravager. They are also able to consolidate into a Warlock that was holding the objective. This is big as it earns 3 kills to Aeldari 2 kills.
Brian Tabata Commentary: At this point, an interesting rules question arises: If choose to fight last occurs at the end of the phase, is LFR still active or no? Since it is player turn, I should be able to determine the sequence of simultaneous events. However, with the spirit of the rules in mind, we decide to play it so LFR is still active (but something to keep in mind for tournaments). Besides, I have full faith in my Wolf Guard Vets.
Big turn for the Vylka Fenryka.
/Space Wolves Turn 2. Score 6 for Hold, Kill, Hold More, Kill More, Recon, and Engineers
Score Check: Aeldari 4 – Space Wolves 7
Battle Round 3
Aeldari Turn 3:
Movement: The Aeldari are definitely on the backfoot and in a precarious situation. With my backlines being threatened and the Wulfen threatening from the front. I fall back with the Warlock, move my Djin-Archon towards the Bloodclaws, double back with 2 Talos, position my WK/Talos wrecking ball a good distance away from the Wulfen in the ruin (16″ away) to minimize how deep a charge they can get off. With any luck with restrain, they will either 1) be stuck out in the open 2) only hit my Talos or Wraithknight, where the Vexator Mask will come into play. I position psykers around to provide some support and move my last Ravager around to get some shots in where it counts. I move the NW Wracks as far as possible from the Intercessor squad that failed their charge but still holding the objective.
Psychic: Fortune goes off on the Wraithknight. Smite goes off on the Bloodclaws for 2 MWs. Restrain on the Wulfen. Do not cast with the Warlock.
Shooting: 4 Talos are able to get some LOS onto Wulfen but the shooting maybe takes out 2. Ravager puts some wounds on the Impulsor and the Wraithknight finishes it off. The Impulsor explodes threatening to do D6 mortals to the Wolf Priest, Phobos Rune Priest, Wulfen, and Intercessor squad. A reroll is used to prevent the explosion, but brining the Space Wolves to 2 command points.
Charge: Talos, Archon, and Urien go into the Bloodclaws.
Fight: Talos, Archon, and Urien wipe the Bloodclaws. Djin blade does a MW to the Archon.
Brian Tabata Commentary: Looking back at the fight I probably should have used my remaining CP to interrupt with the Bloodclaws. Without their bonus attack on the charge however, I thought it best to keep the CP to auto-pass morale in case the squad survived. The Wolf Guard Vet with his stormshield can sometimes pull off amazing things. This would let me continue to hold the objective and make it easier to score recon. Unfortunately it didn’t work out. We’ll score that as a “GDFup”
/Aeldari Turn 3. Score 5 for Kill, Hold, Kill More (spoiler), Big Game Hunter, Butcher’s Bill. Total Aeldari VP: 9
Space Wolves Turn 3:
Movement: NW Intecessors move towards the Wracks and the objective. This is one of the big decision points in the match. With the Bloodclaws taking out the second Ravager the previous turn, Space Wolves have a good shot of removing the last one with Supressors. This would leave the Wulfen in the ruins, which puts a lot of pressure on the Wulfen. The initial plan was to keep them there, but rolled a 6 for the Wulfen advance roll, even with restrain, would put them at a 6 inch rerollable charge to make it into combat with the Talos. Space Wolves decide to try and capitalize on the advance and moved the Wulfen out of the ruins towards the Wraithknight/Talos wrecking ball. Intercessor and Incursor squad move towards the two center objectives, positioning to score Recon. Rune Priest comes out to provide aura benefits and support the Wulfen assault.
Brian Tabata Commentary: Looking back at this scenario I do think this was ultimately a miss play. I intially thought I would be happy with a trade with the Wulfen if they got me all my gangbuster points, but failed to recognize exactly how much they were denying my opponent’s ability to move up the board. Trading the Wulfen this early ultimately let my opponent also score hold more the last two turns of the game as well as the bonus. Waiting one more turn would have also allowed me to get more supporting characters there to support in the assault. With the Impulsor explosion putting me down to 2 CP, I lose significant offensive punch from not being able to fight again. This is another reason I should have just stayed in the ruins and countered. Add another “GDFup”.
Another big mistake this game was forgetting about the vexator mask pregrame when choosing my own relics. I needed the Armor of Russ as a counter. This is also another reason to keep the Wulfen in the ruins as I can spend CP to interrrupt, if he charges me.
Psychic: Smite is cast doing one mortal wound to the Talos. Space Wolves attempt to cast shrouding on the Incursors midfield, but it is denied by the Farseer and his Runes reroll.
Shooting: Suppressors take out the last Ravager. NW Intercessors put shots into the Wracks but only lose 1-2 models.
Charge: Wulfen get a good charge and decide to charge only the Talos, mostly due to the lmpulsor explosion forcing me to less than 3 CP. Without the ability to fight again the Wulfen wanted to engage just what they could kill. Intercessors charge the Wrack squad on the center objective. The backfield Intercessors fail the charge on the Wracks contesting the last objective, denying bonus for the round.
Fight: Haemonculus declares Wulfen to attack last. Interecessors attack the Wracks, but only manage to take out a few models due to T5 and good 4++. Talos are able to take out 2 Wulfen. The combined Wulfen and Attack Upon Death manage to take out one squad of 2 Talos. Good consolidate movement allows for the the unit to stay in combat and within 6″ of the Rune Priest. With the Ravagers dead, the Aeldari will need to finish the Wulfen off in assault, and should be able to finish off the last gangbusters there.
/Space Wolves Turn 3. Score 6 for Kill, Hold, Hold More, Gang Busters, Recon, Engineer. Total Space Wolves VP: 13
Score Check: Aeldari 9 – Space Wolves 13
Battle Round 4
Aeldari Turn 4:
Movement: All movement is pretty obvious at this point. Djin-Archon, Urien, and the Talos all move towards the Wulfen. The Wraithknight moves towards the Rune Priest. Farseer repositions towards the West center objective. Warlock stays home on the SW objective, and the Spiritseer stays within range of the Wraithknight to lend his sweet sweet re-rolll aura.
Psychic: Fateful Divergence is successful on the Wraithknight. Fortune goes off on the Wraithknight. Smite removes a Wulfen.
Shooting: Wraithknight pops an Impulsor in the center of the board, dealing 3 mortal wounds to the incursor squad and 1 to the Wracks.
Charge: Wraithknight into the Wolf Priest, Talos, Djin-Archon, and Urien into the Wulfen.
Fight : Haemonculus declares Wulfen to attack last. Djin-Archon fights first, Removing a Wulfen but promptly use 2CP to interrupt and perform a cheeky pile-in to prevent the Talos from consolidating into the Wolf Priest (in the chance he survives). The Wulfen are able to take out a third Talos. The remaining Talos take the Wulfen down to 1 model remaining but are unable to finish the unit. The Wraithknight is able to stomp out the Wolf Priest ensuring a Butcher’s Bill. The singular remaining Wulfen is able to fight back and put 2 wounds on a Talos maxing out Gang Busters. Huge. Djin blade does another wound to the Archon.
/Aeldari Turn 4. Score 6 for Kill, Hold, Kill More (spoilers), Big Game Hunter, Head Hunter, Butcher’s Bill. Total Aeldari VP: 15
Space Wolves Turn 4:
Movement: Rune Priest retreats towards NE magic box. Suppressors angle out to get LOS on the Wraith Knight. SE Intercessors move back but still within range of the objective. Incursors in the middle of the table move towards the center Wrack squad. Intercessors stay in combat. The center troops are positioned to ensure another Recon point. I decide not to pull the wulfen out of combat, keeping it in range to hopefully finish gangbusters on a Talos with 5 wounds remaining. I gamble getting a kill by being able to finish 3 wracks with my 4 man Incursor squad and 2 intercessors in combat.
Brian Tabata Commentary: Looking back I do think I should have pulled the lone Wulfen out of combat and tried to finish the Talos with 5 wounds. I put too much faith in being able to kill 3 wracks, but that can be a dicey proposition with T5 and a 4++. I needed to set myself up with a backup plan. Putting the Wulfen out of combat would have also forced him to use resources on his turn to remove it as well. I could also have potentially tied for kills if I got the Talos and the Wracks. Potential “GDFup” here.
Psychic: The Rune Priest uses quicken to get in some extra cardio, and get closer to the magic box to deny a headhunter.
Shooting: Suppressors take the Wraithknight down to 21 wounds.
Charge: Incursors charge the central Wrack Squad and gains The Space Wolves the bonus for this round as they place enough models in range to ensure its contested.
Fight: Haemonculus declares the Wulfen to attack last. Combined Incursors and Intercessors remove the central Wrack squad for a kill. Talos and Archon finish off the last Wulfen.
/Space Wolves Turn 4. Score 8 for Kill, Hold, Hold More, Bonus, Recon, Engineers, Gangbusters. Total Space Wolves VP: 21
Score Check: Aeldari 15. Space Wolves 21
Battle Round 5
Aeldari Turn 5:
Movement: Wraithknight maneuvers around the ruin to attack the engineer Incurser squad. Spiritseer follows to provide Spirit Mark aura. Wracks near the NW objective miraculously survive and fallback from combat. Talos, Archon, Haemy, Urien, move towards the Interessors and Incursors holding the two middle objectives.
Psychic: Fortune goes off on the Wraithknight. Fateful Divergence on the Wraithknight. Smite finishes off the Intercessors.
Shooting: Wraithknight is able to finish off a squad of 3 Suppressors in the Space Wolves backfield.
Charge: Wraithknight charges the 5 man Incursor engineer squad. Archon, Urien, Haemy, Talos all charge the reamining Incursors holding the west-central objective for additional movement towards the NW Intercessors squad.
Fight: Wraithknight uses the last CP for Wrath of the Dead and 15 stomps finish off the Intercessor engineer squad. The Djin-Archon and Haemy finish off the Intercessors. The Talos are able to activate and move towards the NW intercessors.
Brian Moy Commentary: I made some HUGE GDFUPs in my previous Fight Phase that really put me on the back foot. I need to focus on my movement and order of operations in the fight phase to ensure I can get something into the Northwest Intercessor squad. I hold and contest 5 objectives at the end of my player turn and net the bonus. Hopefully I can crawl back into it
/Aeldari Turn 5. Score 6 for Kill, Hold, Kill More, Hold More, Butcher’s Bill, Bonus. Total Aeldari VP: 21
Space Wolves Turn 5
Movement: NW Intercessor squad moves towards the fleeing Wracks. Smash Captain and last Suppressor squad move into position. Space Wolves cannot contest hold more, so the Intercessors sole mission is to finish the Wrack squad for a kill this round.
Psychic: No powers are cast.
Shooting: Intercessors plink a few wounds off the Wracks.
Charge: Intercessors charge into Wracks.
Fight: Intercessors finish of the Wracks for a kill this turn.
/Space Wolves Turn 5. Score 3 for Kill, Hold, and Engineers. Total Space Wolves VP: 24
Score Check: Aeldari 21. Space Wolves 24
Battle Round 6
Aeldari Turn 6
Movement: Talos and Djin-Archon move towards the remaining Intercessors. Wraithknight and Spiritseer move north with Spiritseer holding the SE objective. Remaining units position around 5 additional objectives netting the bonus point.
Psychic: Fateful Divergence on the Wraithknight. Fortune onto the Wraithknight.
Shooting: Talos shoot into squad of Intercessors.
Charge: Talos charge Intercessors.
Fight: Talos finish off Intercessors.
/Aeldari Turn 6. Score 5 for Kill, Hold, Kill More, Hold More, and Bonus. Total Aeldari VP: 26
Space Wolves Turn 6
Overview: If the Smash Captain and Suppressors are able to secure a kill the game effectively ends at 26 – 24 in favor of the Space Wolves. However, the Smash Captain does not make the charge and Suppressors are unable to kill a unit.
/Space Wolves Turn 6. Score 1 for Hold. Total Space Wolves VP: 25
Score Check: Aeldari 26. Space Wolves 25
Aeldari Victory 26 – 25
Post Game
Space Wolves | Brian Tabata’s Thoughts:

Takeaways: My initial gameplan was sound. I did draw the talos in the direction I wanted, and ultimately my supressors+impulsors were able to down all 3 ravagers (with the help of some lucky bloodclaws). I utilized my troops well and managed to somehow still sneak out 3 recon points. The list does what it needs to do, and the Wulfen can just hit so hard, the game really is about using their early board control and then setting up a key strike.
GDFUps and Lessons Learned: I had forgotten about the vexator mask when picking relics, and really should have taken the Armor of Russ to combat it. I also continue to pick secondaries that go against my game plan. Recon is always a bit of a trap for me, which did force me to make some bad plays to recover points. Ultimately attacking in two waves during turn 2 cost me the game. Playing cat and mouse turns one and two to get the ravagers was a good call, but I needed to hit the talos with more. I was mostly only in the game due to a lucky charge from the bloodclaws and being able to take out the second ravager. The wulfen did work, scoring 4 gangbuster points and helping deny hold more the first 2 turns, but I think I needed to keep them in the ruin a turn longer, and move up the smash wolf lord to support for a later game charge. Denying his ability to push up the board turns 4 and 5 would have been more effective since it ultimately after the wulfen died it let him start scoring hold more in later turns, as well as the bonus.
MVP: While the Wulfen never fail to perform, as long as they are used carefully, it really was the supressors that let me enact my battleplan. They gave me the initiative forcing my opponent to me. They are such a flexible and amazing unit, and are highly underrated.
Aeldari | Brian Moy’s Thoughts:

Takeaways:
- Overall: Try not to play a game of 40K after being awake for 38 hours straight. What an amazing game though and Brian is an incredible general and a really fun gaming partner. I was essentially outplayed and on the backfoot for almost the entire game. However, I was able to sneak by with a good Turn 5/6 that kept me in it. Head Hunter was a mistake, but perhaps it made Brian more tentative with his Rune Priest and Smash Captain. Engineers would’ve been the better choice and holding the Ravagers back to zone out T2 – 3 would have been the smarter play. Lots of mistakes, but a good test adding the Wraithknight in lieu of the Skyweavers and Harlies.
- The Wraithknight/Talos Wrecking Ball: Combined with the Vexator Mask it did a fine job of providing solid board control and created my own “do not mess with me bubble” that beatstick units like Wulfen or White Scar Centurions provide. It’s a strong combination that can shoot its way up the board and do work in close combat. I will keep testing this.
- Ravagers: At 140 points are in a strange spot. For 2 more points, I could have Fire Prisms which can zone out my battlefield more effectively due to range, and provide me increased threat range for more effective turn 1 firepower for kills as well. I will need to highly consider this going forward.
GDFUps and Lessons Learned:
- Return of the Wraithknight?: I actually think the Wraithknight … might be playable again … However, I believe I need more of a backfield presence to ensure I am not as vulnerable to outflanking and backfield attacks. I am weary of going second against lists that have a ton of long range firepower … IH trip executioners, Knights, and/or Tau.
- Secondaries: My gut told me to go with Engineers, but I wanted to test a theory about trying to nullify the impact of Brian’s characters. If I choose Engineers, and zone out my backfield with my Ravagers, I may lose out on 1 Butcher’s on turn 2 (which I did anyway), but make it up on Turn 6. I also deny a kill, a hold more, and a Big Game Hunter. Board control secondaries are not as easy for me to obtain, and I will need to figure out a more viable way to ensure I am getting 3 – 4 secondary points on some sort of board control choice.
- Fatigue and Fighting: I will admit, that I felt that at Turn 3, I had Brian where I wanted him. I was able to deal with the Bloodclaw bomb, and still had my WK/Talos castle in tact to force his Wulfen into my trap. However, careless play on my part allowed Brian to max out Gang Busters, which I could have denied him another 2-3 points if I played more carefully with positioning, target prioritization, and actually caring about piling-in and consolidation moves.
MVP: The Wraithknight earned me by far the most VPs. The Talos always do work, but gave up so many VPs due to my sloppy play in the Fight Phase turns 3 – 4. The Haemonculus with the Vexator mask is always so powerful and with the Wraithknight’s large base, makes for a wonderful formation. I will like to test this going forward. Today, it goes to the Wraithknight.
Closing
Thanks for reading and please feel free to leave your thoughts and feedback in the comments. Additionally, you can join our Discord community to learn more about what it means to be a Grim Dark Filthy Casual!
Follow us on Twitter, Instagram, and Facebook:
- Twitter: @GDFilthyCasuals
- Instagram: grimdarkfilthycasuals
- Facebook: grimdarkfilthycasuals

is the founder of Grim Dark Filthy Casuals, Assistant to the Editor in Chief, Author, Content Director, Resident Emo Aeldari Player, and Chief Filthy Casual
Comments
Trackbacks & Pingbacks
[…] Ravager spearhead. If you have not had a chance to read the battle report, you can check it out here.The combination of Expert Crafters, Masters of Concealment, or Masterful Shots (though I value the […]