So you want to start playing Warhammer 40k?
Today we have a special featured guest writer! GDFC Member Mattie F (@dailydoseofheresy) has contributed an excellent article for all of you out there that are just getting started in Warhammer and looking to learn or refresh on the basics of 9th Edition! We love to see the diverse contributions of GDFC members like Mattie, so if you’d like to join him and hundreds of others as we talk about wargaming and grow in our hobby and battle skills, hit the links at the bottom of the article! From there, I’ll toss it over to Mattie!
– Warboss Lisa
Preparing for Your First Match
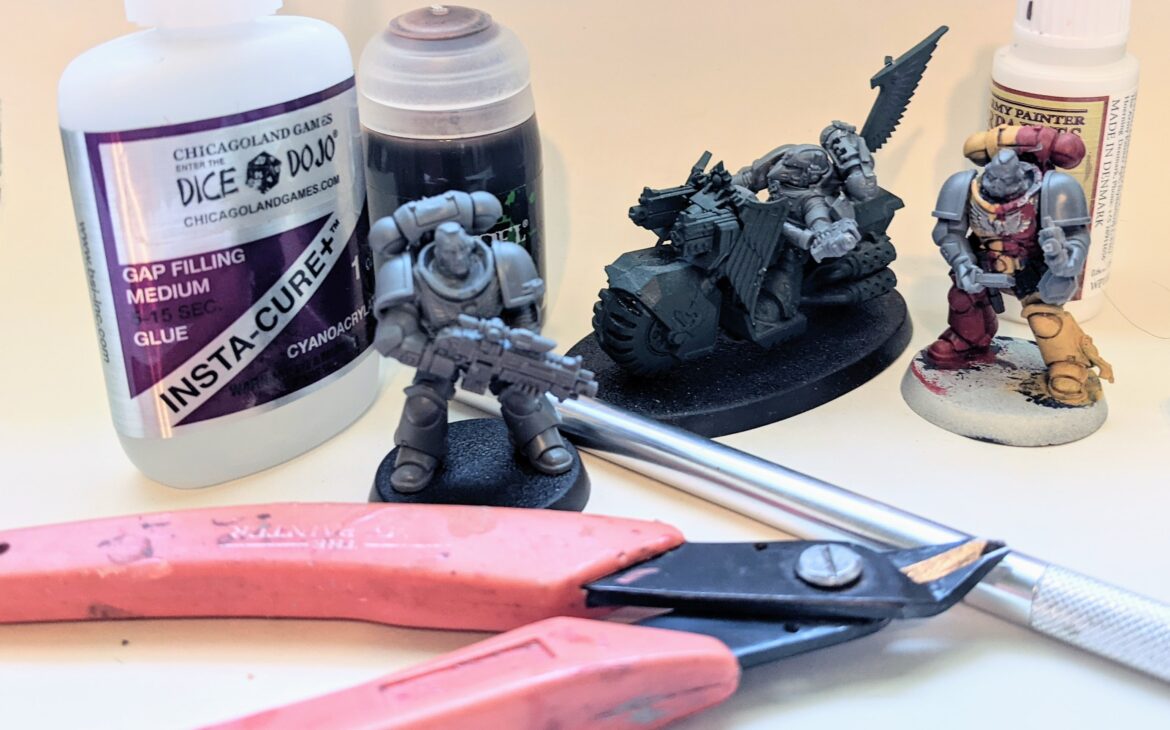
So you want to start playing Warhammer 40k, awesome! Welcome to this crazy hobby! Be prepared for getting messy in the hobby stage, getting overwhelmed reading/listening/watching all the crazy lore and over course feeling like you ran a marathon after your first 2000 point game.
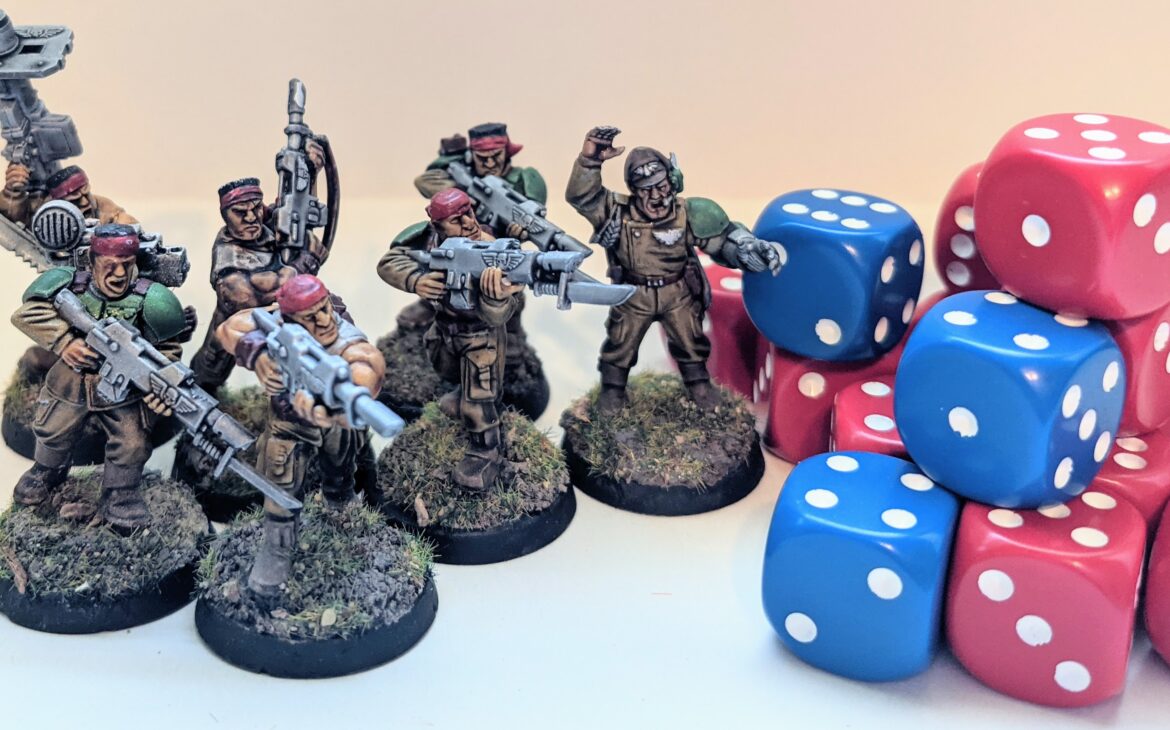
Now the last part is what I want to talk about today, actually playing the game. I came back to 40k in 8th edition after nearly 20 years away from it so it wasn’t that long ago that I was taking the same steps you are. There are plenty of resources around to help get you started with your first games so I’m going to assume at this point you’ve bought, built and painted your army, got yourself some dice and a tape measurer and at least spent 10 minutes reading the rulebook and your codex and maybe even tried a game or two at 500 points. Well done, you!
Let’s go back to the “Build your army” stage for a minute if you haven’t quite got there yet. You’ll see thousands of people recommend buying and painting the models you like, not to chase what’s “good” and I agree! If I was to have done that when I started I’d be looking at a shelf filled with Intercessors, Impulsors and Smash Captains. Of which now are almost all kinda meh. So let’s see what other things can help you at that stage.
Weapon Loadouts
So you’ve read your codex or looked online to see what weapons are bestest. Cool. Now the thing that will save your brain and actually make you a better player quicker is to take whatever weapon choice you like and make sure all the models in your unit have the same thing. If you liked the look of Terminators with Thunder Hammers and Storm Shields, then build all 5 that way! This will give you a unit that is dedicated to a single role and is simple to use on the table as they all have the same weapon profile.
Some armies allow Sergeants or Squad Leaders to have a different loadout OR let you bring some heavy weapons in your squad. This is fine, but I still suggest for your first half dozen games or so to not use these in your army just yet. Build and paint them, then put them to the side for now.
Ok back to business now. You’ve got everything ready and you are going to play your next game at say 750 points. You and your opponent have decided on a Matched Play mission so your armies should be evenly balanced against each other. You’ve got an army of 5-6 units that all have the same weapon loadouts so your brain doesn’t explode.You’ve used Battelscribe or the 40K app to make your roster into a readable format. What’s next?
Print out that roster
https://buttscri.be/ was made by our friends at Goonhammer to help clean up your roster into an easily printed pdf format. As nice as Battlescribe or the 40k app might be, it’s much easier to read things on paper when laid out on the table for easy access for you and your opponent.
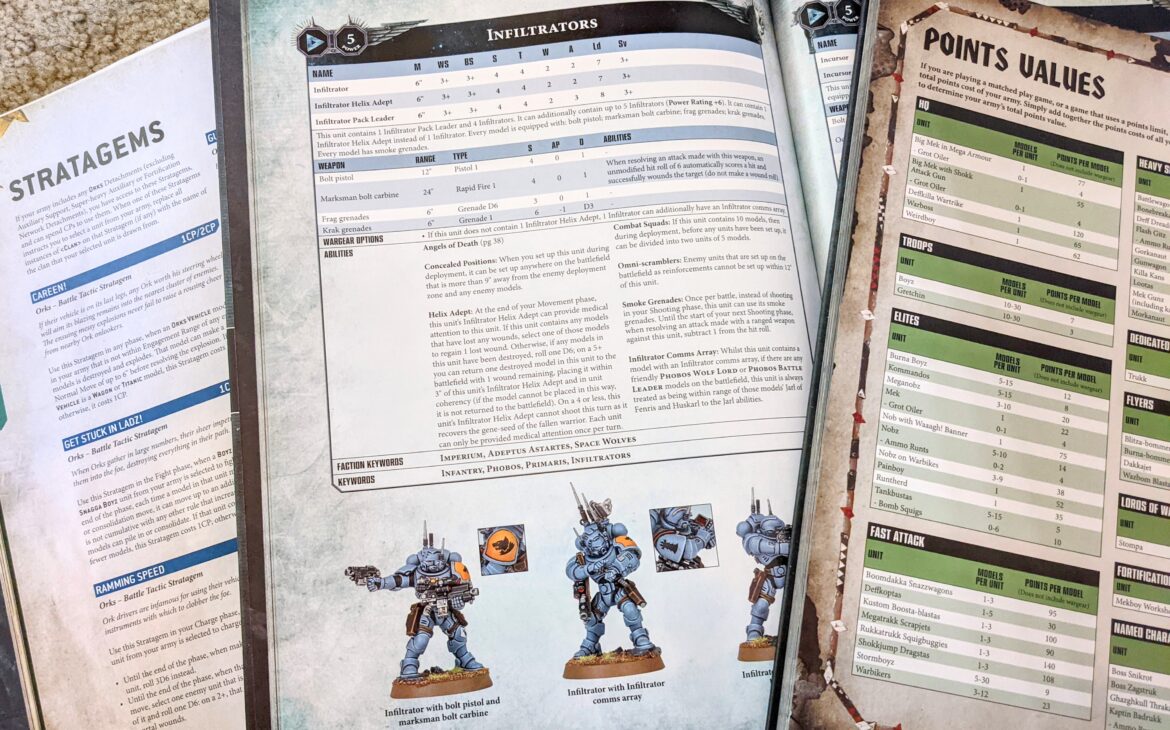
Now it’s not all that simple using these. As a new player you have to be careful to double check your roster with your codex or an online resource like wahapedia. Why? Mistakes are made, sure but also even on Buttscribe it will not list all the weapons you are able to fire. If your unit has say 2x Lascannons, only 1 Lascannon profile will be listed, it’s up to you to remember you have 2!
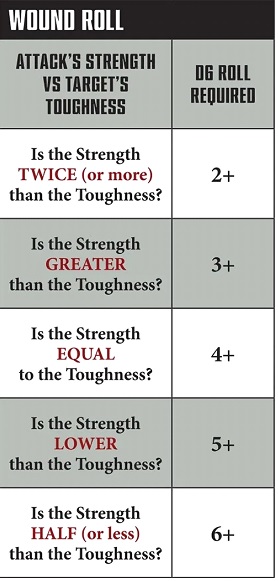
Bring your Wound Chart
Bring Player Aids!
- If you don’t have Datacards for your army, take a look at your codex and pick out all the strategems that work with only the units you have brought and make a cheat sheet. There’s no need to print out or remember a strategem for Poxwalkers if you aren’t bringing any to your game. You can separate these Strategems into the phases they work in as well, using a highlighter is a simple way to do this.
- Bring along some paper, post-it notes or even those tiny whiteboards. You can use these to write down and list any buffs/debuffs, warlord traits or relics for a unit and place them near that unit on the table. This will greatly help you remember those special rules that are buried in your codex or come up as the game goes on. I still do this as every opponent you play will have something new that you’ll want to keep track of.
- Keep notes! Don’t use your opponent’s movement phase as a smoke break. Have a look at what’s going on on the table and also write down any rule that you missed for future reference, something that worked/didn’t work or even just something cool that happened that you can add to the story of your army.
- Bring water, stay hydrated! 40k can be an endurance game more than anything, even when playing smaller games with friends. You will likely be taking 2-3 hours to play even your 750 point game since you are just getting started.
Playing Through Your First Match
Ok, well now you are fully ready for your game and are set to throw down some dice! So how about some tips for actually playing? What are some key rules to remember? Let’s go through some phase by phase:
Pre-Game:
- Share your army list with your opponent. Let them know how much CP you have, your types of units, special army rules you have, Warlord traits, relics, psychic powers, etc. Answer any questions they have as well, Warhammer shouldn’t be a GOTCHA game, rules need to be transparent, strategy doesn’t. Some questions to ask/answer are:
- Does your army have ways to redeploy units?
- Can your units advance and charge?
- How far can your big guns shoot?
- What’s the threat range (how far can they move + range of their weapons) of X unit?
- Talk about Playing By Intent. What does this mean? It means that you should communicate everything you are doing so that your opponent knows what’s going on and you can agree on the state of play. For example, you want to move a unit behind some cover and out of Line of Sight to an enemy unit. Ask your opponent if, from their point of view on the table, that unit can’t be seen by them. Do this with everything as not only does it make the madness of 40k easier to follow, but you’ll also find yourself remembering more details and rules!
- Choose your secondaries. Now hopefully you thought about these while making your list, but at this point you likely don’t have a big roster to choose from anyway, so go with the ones that make the most sense (Killing certain units if your opponent has a lot of those, movement based ones if you have a lot of speed, action based ones if you have a lot of cheap bodies, etc)
- Declare reserves and transports – Let your opponent know if you have any units going inside a transport, being put into Strategic Reserves or Outflank.
- Roll for Attacker/Defender and Deployment
Deployment
At this point you should know roughly what your opponent’s army can do and which units to steer clear of. You also know what your own threat ranges are and what you need to accomplish to gain points for the primary objective and your secondaries (again, roughly). So now you need those sweet, sweet tips!
- Assume you are going second! Deploy your units conservatively, unless you have a way to redeploy before the first turn starts. You don’t want to be caught out taking a chance pushing everything up and allowing your opponent to kill half your army turn 1. All that hard work we just did preparing for this game would be for nought!
- Deploy your less important units first. This doesn’t mean deploy your cheapest stuff first! Your infantry that are going to be scoring you primary points are still vital. You can deploy things like your characters and support units early. You might then bait your opponent into focusing his own powerful units into a certain area.
- Be sure to deploy the units that work together at least close enough to each other that they can meet up on your turn
- Keep your characters safe! Look Out, Sir is a complicated rule but think of it as this: If your opponent’s unit is the nearest unit to your character, then it is going to be in danger. There’s more to it than that, but for now try to keep a vehicle or a unit with at least three models in front and around your important characters.
Command Phase
This Phase’ importance depends on the army you are playing. Your cheat sheet will help you out here. Be sure to get your Command Point and double check that any of your special rules or stratagems are meant to be used here. If you brought any characters that use prayers or other “Command Phase” abilities (Space Marines, Chaos, and Necrons take special note!), don’t forget to use them in this phase. Score most of your points as well here! Do this with your opponent so nothing is missed. Remember that there are maximums for scoring, check your mission and secondary choices.
Movement Phase
This is the most important Phase of the whole game. It’s where you are setting up what you can do in later phases. Some things to remember:
- Pre-measure
- Measure out not only your movement characteristic, but also the distance you will be able to shoot/use psychic powers/charge afterwards.
- If you have special bonuses like auras, make sure you will still be in range of those after movement
- Advance
- Be aware that unless you have Assault weapons you usually won’t be able to shoot after doing this. You can still perform Psychic Powers or do actions though
- You also won’t be able to charge after advancing unless you have a special rule or stratagem to do so
- Cover
- When moving a unit towards cover, remember that you will most likely want to be behind, but not inside or touching the terrain. The reasons why are a bit more complicated but for now just get near enough to become obscured from your opponent’s line of sight, or -1 to hit through dense cover.
- Be mindful of lines of sight. Bend down, look through streets and valleys to see what you can see… and what your opponent can see too.
- Actions
- Some objectives require you to perform actions. These are generally done at the end of the movement phase, and unless you have a strategem or special rule, the units performing them can’t do anything else that turn, including shooting or charging.
- Some objectives require you to perform actions. These are generally done at the end of the movement phase, and unless you have a strategem or special rule, the units performing them can’t do anything else that turn, including shooting or charging.
- Reserves/Deep Strike/Outflank
- At the end of the movement phase, your units put in reserves can come on the table, depending on the reserve abilities you used. Don’t leave your terminators on your side board all game!

Psychic Phase
- Psyker units have some cool abilities and all know Smite in addition. Check your powers for the rules for using them.
- Your Psykers will damage themselves for D3 mortal wounds if you roll two 1s or 2 6s, so decide how important that power is to cast! If you have no reason to cast, don’t risk these “Perils of the Warp!”
- You can still cast Powers if you are in combat or advanced but you can’t if you Fell Back
- Don’t forget that every Psyker can deny at least one spell (some can even deny more!). This provides some interaction between you and your opponent in this phase.
- Abilities will specify their range and whether you need line of sight or not.
Shooting Phase
Point, fire, hope they die. Shooting is pretty simple and there are a few things to be aware of like terrain type bonuses, Look Out, Sir, etc. Don’t worry too much about these just yet – for now there are a few things to think about.
- Weapon types
- Rapid Fire lets you shoot twice if you are within half range of the unit you are firing at (12” or less for a 24” gun, for example)
- Heavy weapons on infantry usually get -1 to hit if you moved that unit or it came in from reserves
- Assault weapons let you shoot even after advancing but you will get -1 to hit
- Pistols can be shot, even if you’re in engagement range!
- Only one grenade can be thrown per unit, and the model that does so cannot fire any of their other ranged weapons.
- NOTE: you can only have a maximum of +1/-1 to hit or wound for shooting and fighting. So if your Heavy weapon infantry squad comes in from reserves turn 2 and you want them to fire on the -1 to hit aircraft, go for it! You’ll be -1 to hit, not -2 (now if you can somehow give them a +1 to hit, they will still be at -1 to hit as technically they were at -2 before your modifier)
- Splitting fire & Choosing Targets
- Don’t do it. Don’t. If you need something dead, FIRE EVERYTHING. Now obviously if you have a mega tank with 10 Lascannons and a measly Heavy Stubber, you could fire all the cannons at your opponent’s tanks and shoot the stubber at some infantry. This is more about putting 2 Lascannons into 5 different enemy vehicles or monsters and expecting them to do 10+ damage to each one. It’s not going to happen!
- You have to declare ALL your shots at all your chosen targets BEFORE you start rolling. So if you’ve committed 4 of your guns to one unit and you kill them after 3 of them have been shot, you can’t choose another target for that 4th gun. Just be glad you killed the thing!
- If you are looking to charge a unit after shooting it, be careful as every one of your opponent’s models that dies could increase the distance of your charge!
- Shoot with the models that are nearest to your units first for the same reason, you might not be in range anymore with your other unit if your opponent pulls models strategically
Charge & Fight Phase:
There is A LOT going on in the Charge & Fight Phases so let’s keep things simple.
- Measuring & Completing Your Charge
You can charge any unit within 12”- You can charge multiple units but your charge would have to reach all targets to be successful
- You need to finish your charge within 1” of the enemy unit. So if you are exactly 6.999” away, you only need to roll a 6 for your charge. This is why a charge out of Deep Strike (further than 9” away from your opponent’s unit on landing) still only requires a 9 for your charge roll
- 8+ inches away is not a good idea
- 7” is about a coinflip
- 6” or less and it’s a decent option
- Heroic Intervention
- After you charge, your opponent can move a Character into the fight if it’s within 3” of your charging unit. Space Wolves in particular have greater flexibility with this. This happens before piling in! Ask your opponent if he has ways to extend his HI range, just in case.
- If your opponent does HI, you can choose to attack that unit too, so every Heroic Intervention choice should be made carefully.
- Pile In
- After all your units finish charging you can pick each in turn to Pile In. This is a 3” movement for each attacking model. You have to go closer to the nearest enemy model but you don’t have to make base-to-base contact. Use this to maximize the amount of models that can attack (see below)
- After all your units finish charging you can pick each in turn to Pile In. This is a 3” movement for each attacking model. You have to go closer to the nearest enemy model but you don’t have to make base-to-base contact. Use this to maximize the amount of models that can attack (see below)
- Order of Fighting
- All of the units that charged this turn get to fight first. After that, the defending player can pick first between the models that didn’t charge this turn.
- There are many abilities that change this order. One stratagem that everyone has access to is Counter Offensive (2CP); this stratagem will allow you or your opponent to interupt this sequence and fight with one unit. Although the charging player always gets to select the first unit to fight, their opponent can use this immedietely afterwards, even if there are other charging units still ready to fight.
- Fighting
- Your attacking models that are within 1” horizontally or 5″ vertically of an enemy model AND friendly models within ½” of those attacking models can make attacks. This generally lets you fight in two ranks.
- Remember though, a unit that charged can only fight another unit it declared its charge against!
- Consolidate
- After fighting, your models can make another 3” move towards the nearest enemy models. This could be ones you are already fighting or give you some extra movement towards the next enemy.
- Be aware: If you consolidate into another enemy unit it will get to attack you that turn!
Morale Phase
After all units have finished their actions, any units that have lost models must make a Morale check. This is a simple test. You roll a D6 and add the amount of models that unit lost this turn. If the total is more than your unit’s Leadership trait then they fail that check. (for example: A Space Marine unit lost 3 out of 5 models. The unit has a Leadership trait of 8, meaning you would have to roll a 6 to fail morale)
- Failing Morale
- 1 unit flees right away. The remaining units then make another test.
- Roll a D6 for each model in the unit
- If the unit is at more than half it’s starting strength then any roll of 1 you lose another model
- If the unit is less than half strength then any roll of 1 or 2 loses a model
After your turn is over, check your secondary or mission objectives to see if you score any points “At the end of the turn.”
Concluding Thoughts
Aaaand that’s pretty much it! It’s a complicated game and there is MUCH more than this to learn, improve on and think about. Every game will play differently depending on your lists, your armies and the mission. So once again let’s go over some of the basics (TL;DR)
Keep it Simple!
- Talk with your opponent beforehand and ask questions
- Bring everything you need so that you aren’t relying on your memory
- Play by Intent
- Take your time with Deployment and pre-measure your’s and your opponent’s threat ranges
- Double check for anything that needs to be done in the Command Phase
- Plan out your Movement carefully!
- Drop your troops from Reserves after turn 2, but don’t forget about them!
- In shooting, make sure Dead means DEAD
- In fighting, don’t rely on long charges and beware of the Counter Offensive strategem
- Use Pile Ins and Consolidate movement to your advantage
- Be aware of Heroic Interventions
- Morale is actually a thing!
- Don’t forget you are trying to score points, not just kills
- HAVE FUN!!
Good luck, Wargamers! – Mattie F, GDFC
Warboss Lisa – “Once again, a big thank you to Mattie for preparing this introduction (or reintroduction!) for everyone! In addition to being a wonderful player, they also paint far more gorgeous models than I, and you can check them all out at https://www.instagram.com/dailydoseofheresy/ !”
“In future articles, we’ll have more coverage on the new Orks, Grey Knights and Thousand Sons codex releases. If you’re interested in submitting an article of your own, or joining our Discord which is full of other like-minded players and hobbyists, check out the links below! “
Twitter: @GDFilthyCasuals
Instagram: grimdarkfilthycasuals
Instagram: orky_paintress
Facebook: grimdarkfilthycasuals
is a founding member of Grim Dark Filthy Casuals, Author, Content Lead, Warboss, Tournament Organizer, and GDFC’s Chief Krumpin’ Officer