
Northern Front TTS RTT Tournament Overview: Baring the Rout’s Fangs
I had a chance to test out the new Space Wolves in my first competitive event since Saga of the Beast was released. I would like to detail the event, my army list, and walk you through my approach to the matchups.
Northern Front TTS RTT
Jon Kilcullen and the Northern Front Winnipeg team put on a fantastic event with the Northern Front TTS RTT. It brought 28 people together from all over the world and from all skill levels, attracting some top ITC players as well as introducing a lot of first-time competitors to the tournament scene.
It was an amazing experience for me. I got to play three top-notch opponents and meet people from around the world I would not have otherwise ever had a chance to interact with. While COVID-19 has halted competitive tournaments in the meantime, events like this one have accelerated the development of the global Warhammer community, and that is something to be celebrated.
I also wanted to thank I Want That Stuff, a gaming store based out of Brandon, Manitoba, Canada, for sponsoring the event and offering prize support. Be sure to check them out if you are ever in the area!
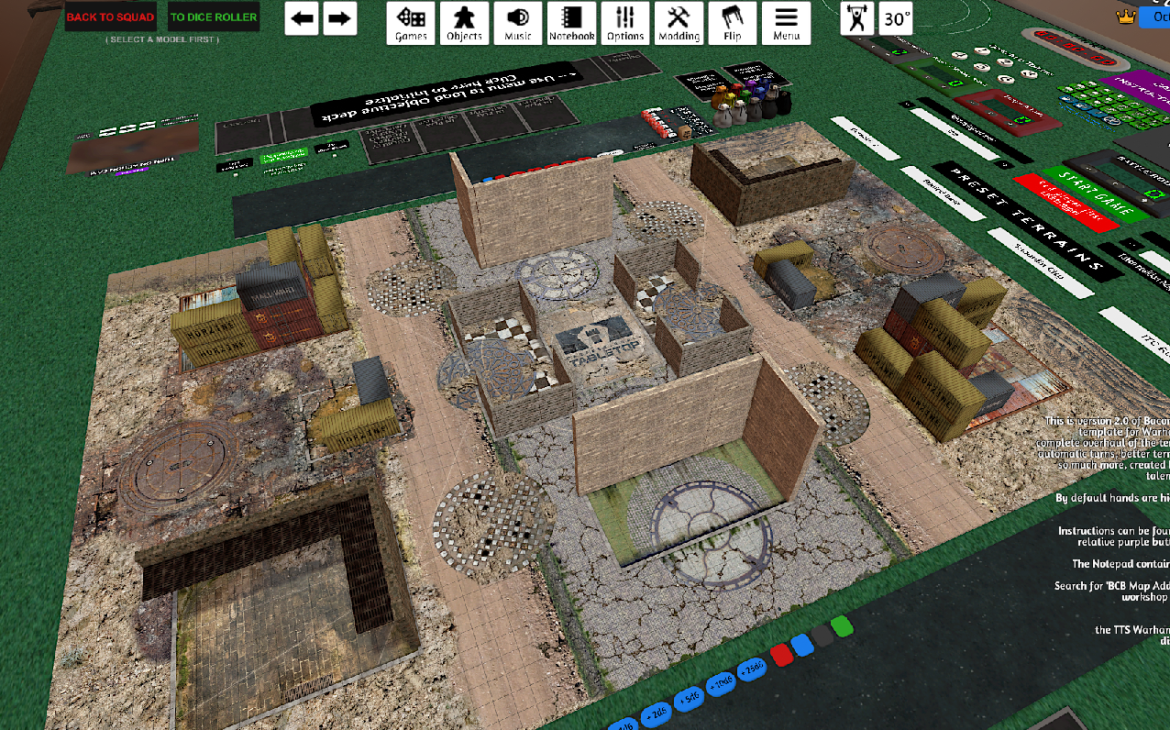
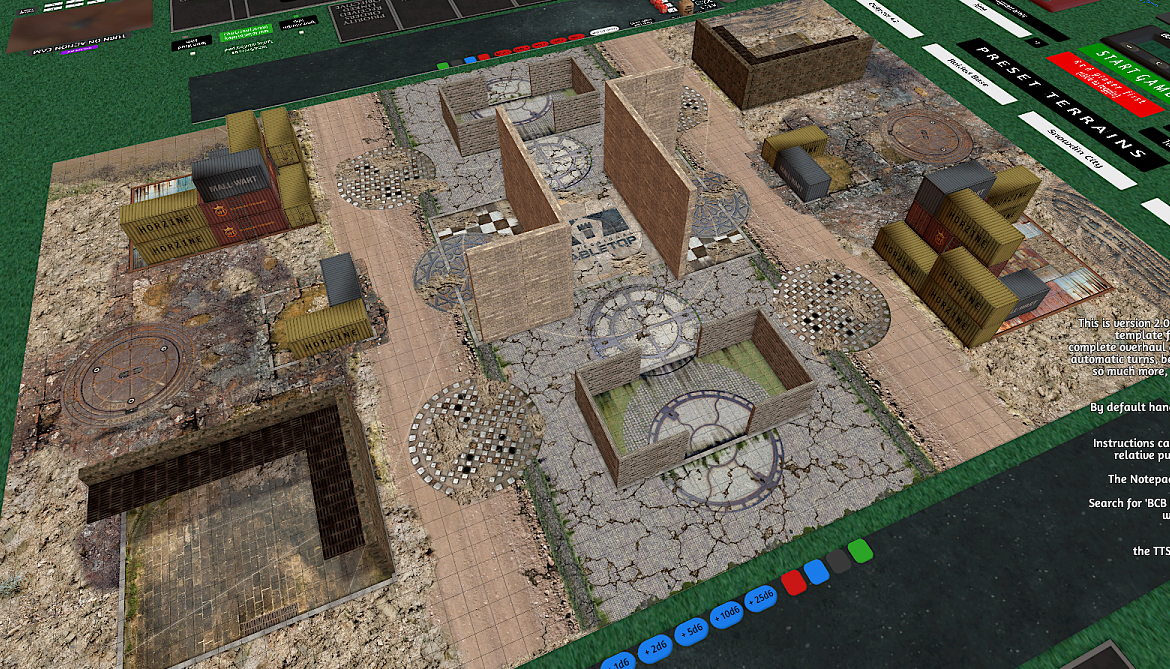
The Northern Front TTS RTT was a three-round ITC event playing ITC Mission #3, 6, and 1, in that order. The following standardized maps were used below depending on the deployment style. The winner would be determined by total battle points at the end of three rounds.
Space Wolves In a Brave New World
I have had some time to ruminate on the new rules in Saga of the Beast, so I thought I would illuminate how I have decided to renovate my ITC. Table Top Simulator has been a valuable tool in testing out these lists given the current pandemic and if you are getting anxious for a game I do suggest you try it out.
I must stress that this is not the only way to run a Space Wolf list, but it fits my playstyle well. Saga of the Beast has luckily given us many compelling options, so don’t be afraid to test your own ideas and stick to your guns. A lot of people were saying to not use the units I’ve listed below. So without further ado, here is my list:
2000 PTS ITC- Space Wolves
Battalion
120 Ragnar Blackmane
143 Wolf Lord: warlord, jump pack, thunder hammer, storm shield
102 Intercessor x5: thunder hammer, aux grenade launcher, bolt rifles
102 Intercessor x5: thunder hammer, aux grenade launcher, bolt rifles
95 Incursors x5
97 Impulsor: 2xstormbolter, shield dome
97 Impulsor: 2xstormbolter, shield dome
97 Impulsor: 2xstormbolter, shield dome
378 Wulfen x10: 6xthunder hammer/storm shield, 2xfrost claws, 2xgreat frost axe
Battalion
99 Wolf Lord in Phobos Armor
99 Wolf Priest: jump pack, power fist
95 Incursors x5
95 Incursors x5
95 Incursors x5
286 Thunderwolf Calvary x6: 1xthunder hammer/storm shield, 5xchainsword/storm shield
The General Army Strategy
The army is centered around setting up the Wulfen to fight twice in a turn, crippling your opponent. The lists characters are also very lethal as well, offering a second punch or backup plan should the Wulfen fail. All the units in this list compliment this strategy and help fill in particular gaps and weaknesses. The units can be grouped into four different groups: hammer, offensive line, board control, and Auxiliary Support.
Hammer
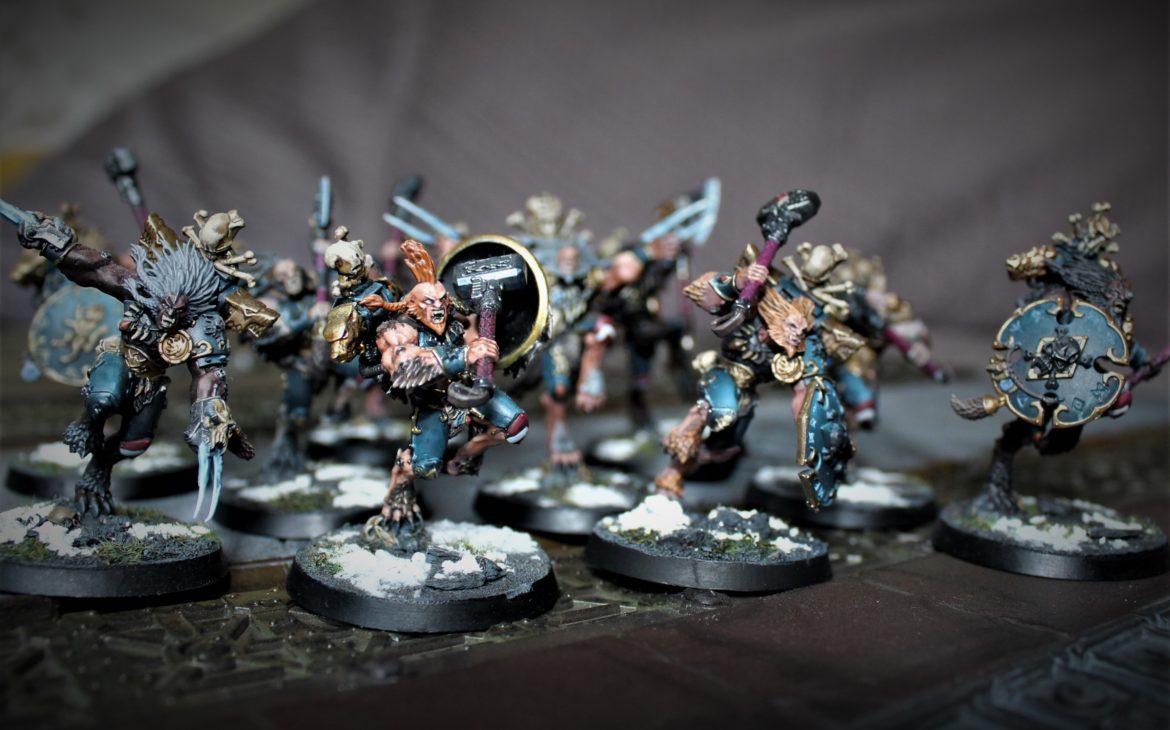
The list will take a beating early game, but it is designed to. The Wulfen are absolutely devastating and completely trump some other armies. You will have to keep your composure and resolve as you take your lumps early on, but even a single character in the right place at the right time will swing the game for you.
Even 4-5 Wulfen making it to the enemy lines is enough to cripple them, and the key to using them well is taking a large unit. This list can lose 4-6 Wulfen on the way to combat and still keep kicking.
Taking full stormshield and thunder hammers are not required, and not recommended. For me, the ideal loadout is 6 thunder hammer/storm shields, 2 great frost axes, and 2 frost claws (including the Pack Leader). I do this for several reasons:
1) You don’t need thunder hammers against every list. Wulfen are very often tearing through infantry, where their other weapons are better suited for the task. There are games where the frost claws are the MVPs of the unit (vs GK, DW, and any T3 armies to name a few).
2) Claws and Axes make the Wulfen more independent. With all the extra combat movement we have access too, your Wulfen will often find themselves wanting to extend beyond support auras, especially if they are fighting twice. The extra attacks, hitting on 2s, and rerolling wounds for the claws all make the Wulfen much less susceptible to variance and underperforming.
3) For durability the Wulfen can usually eat a full turn of fire losing 4-6 storm shields. If you need to tank small arms fire, the other weapons can do that just fine. Remember a 4+/5+++ is equivalent to a 3+ save (we all know how annoying shield drones are). Even against AP-1 I usually don’t mind taking the 5+/5+++ if I need to keep my Thunder hammers alive.
The real power of the Wulfen however, especially in such a large unit, is the presence the offer to being able to control the pace of the game. Using this in conjunction with the rest of the army lets you have a commanding presence on the battlefield.
Offensive Line
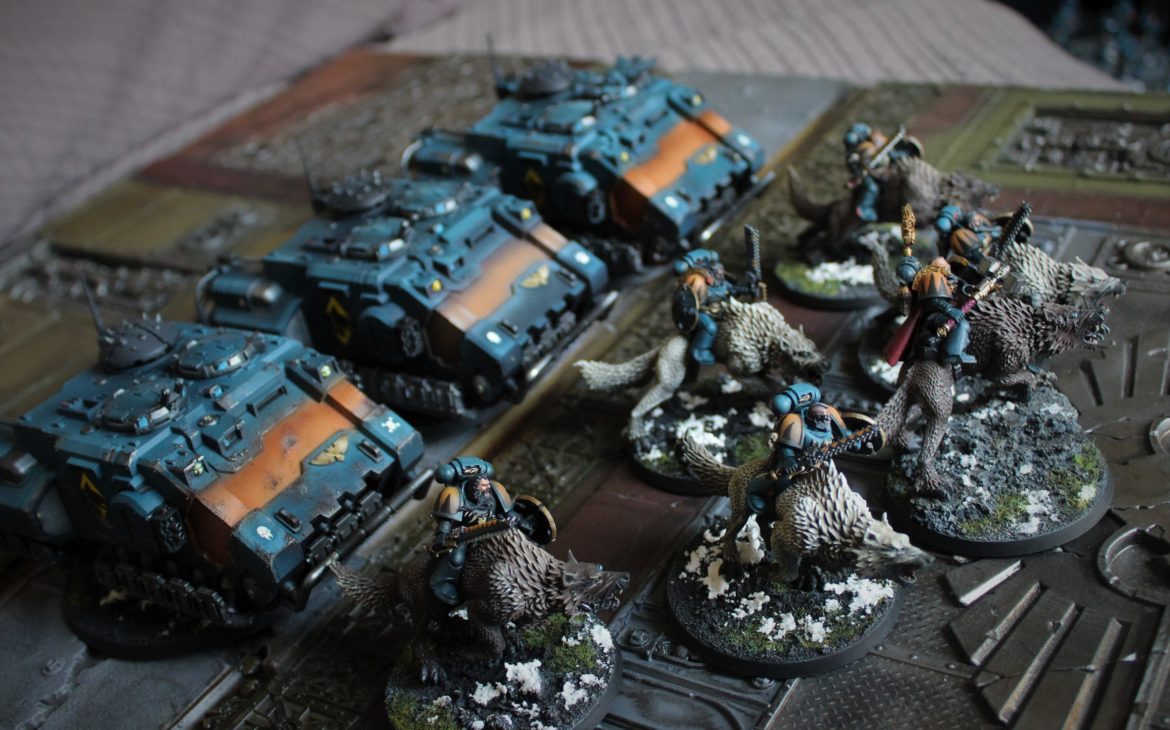
The Impulsors and Thunderwolf Cavalry form the offensive line. They have the durability and toughness to advance midfield and screen for your characters. The Thunderwolf Cavalry have been a great addition post-Saga of the Beast as they are more durable than the Impulsors in many ways. They have equal durability against strength 5, and 7 shooting with any AP, and more durability against S4 and S8+ with AP, especially with access to Transhuman Physiology. Their wounds are also compartmentalized to 3 damage which does help against flat damage 2 and D6 damage weaponry as well. Another very important aspect to the TWC, is they are like Impulsors with teeth. They can more effectively zone midfield as opponents are more wary to get within 6″ and be heroically intervened by them with Counter-Charge. Thunderwolf Cavalry also provide offensive utility with Vicious Executioners. Having reliable mortal wound output against characters or infantry units with good invulnerable saves is not to be underestimated.
The offensive line is the first wave in combat that has the durability to play the attrition war with the opponent in the early turns. The Impulsors and TWC also have the resilience to survive overwatch and pave the way for the rest of the army in combat.
Board Control
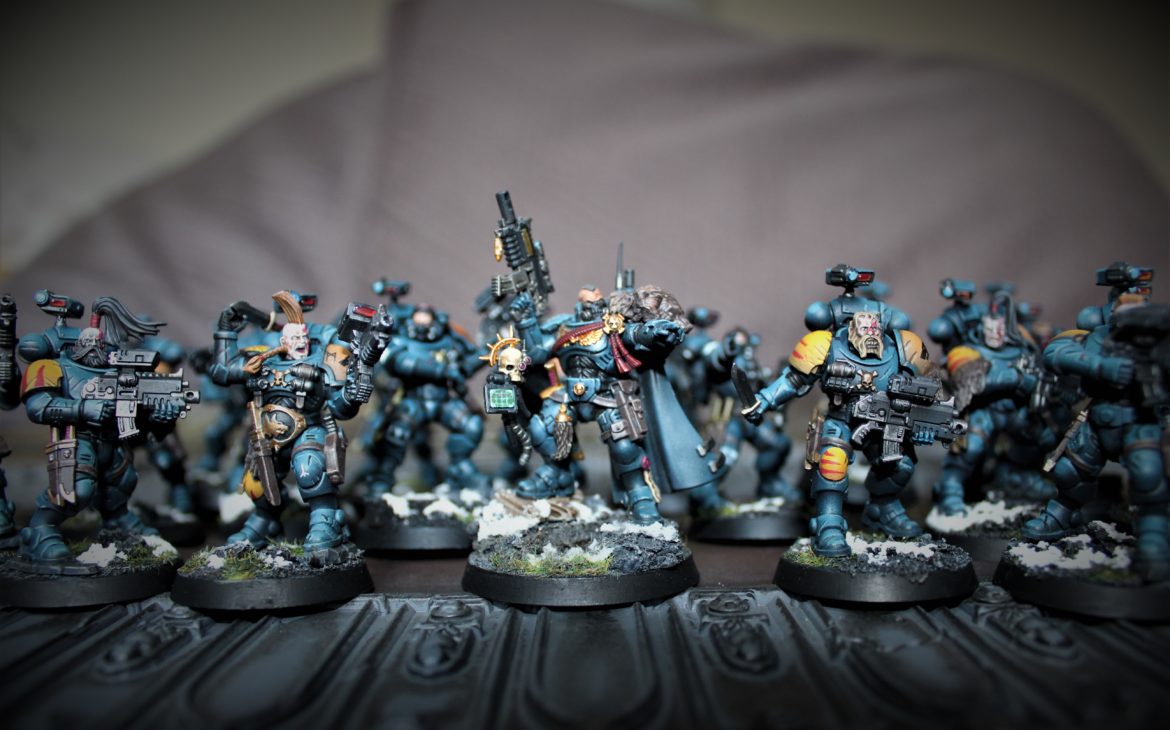
The Incursors initially started as a placeholder unit, but I quickly found them to do an excellent job of boxing my opponents into their deployment zones. Even fast armies such as mech Aeldari and Harlequins were being contained. They are the sheepdogs herding the opponent into a nice ball for the Wulfen to hit. They are also important in robbing the enemy of ruins and valuable terrain they can deploy units into to avoid the Thunderwolf Cavalry.
The Incursors also help keep pace in the primary withhold more as the list is usually getting few if any kills in the first turn. This really lets me be more patient with my Wulfen, making them even more powerful. The board control they provide is also very important for letting this list complete two Maneuver secondaries. This takes the pressure from having to take two Seek and Destroy secondaries, again letting me be more patient.
Having four Incursor units also makes your opponents second guess giving you the first turn. Going second in ITC while favoring Maneuver secondaries is Incredibly powerful.
The Phobos Wolf Lord may seem like an odd choice to many, but he does a few important things for the list. His board control is great in the list as he is comfortable sitting on a midfield objective while the rest of the army advances. His ability to deny deep strike within 12″ comes in very hand for this as well. Morkai’s Teeth Bolts is an incredibly useful relic as the Phobos Wolf Lord can apply a re-roll to wound against whatever unit I need to kill. Using a conventional Battle Leader to provide this aura could be very difficult once all the fighting broke out as you would have to worry about multiple charges, extra combat movement, and maintaining screens for multiple characters. Morkai’s Teeth Bolts makes accessing re-rolls more consistent, reliable, and less risky. His master crafted instigator bolt carbine even lets me use Morkai’s Teeth Bolts against characters as well.
The Vanguard Warlord Traits are also underutilized. Marksman’s Honors can make him a nightmare against toughness 3 characters, but the real star is Shoot and Fade. Extra movement is powerful, especially when you don’t even have to roll a psychic test or spend CP to do it. It lets him get around the map to where he wants to be and is amazing for getting Incursors around the board. I can keep them back in the early turns to zone out my side of the board and then start sling-shotting them forward to have an impact in the later turns of the game. People also don’t expect Incursors to move 14″ in an Impulsor, get out within 3″, move 6″, and then Shoot and Fade another 6+D6″. This is incredibly powerful in stealing late-game objectives.
The real benefit of Saga of the Beast is that even basic SW troops are now incredibly deadly. Incursors main role is to hold the board, but if they are ignored by the opponent they can power up as I mentioned in my article here. Don’t underestimate Litany of Hate and Gene-Wrought Might.
Auxiliary Support
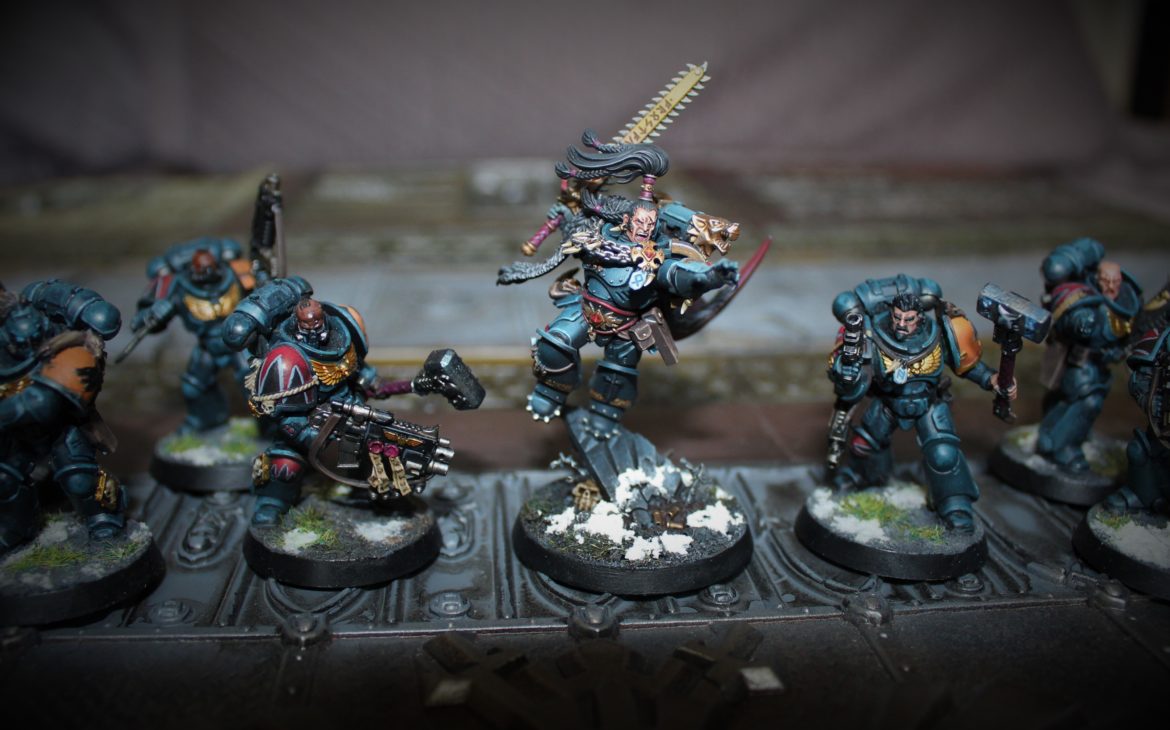
Intercessors, Ragnar, the Wolf Lord with jump pack, and the Wolf Priest are all-powerful combatants in their own right, but they are fragile. They really shine in the later turns of the game as the board starts to thin out or as more things are tied up in combat, removing your opponent’s answers to them. As such these units are typically held more in reserve to close out the game. Once the TWC and Wulfen have cleared key units in the opposing army, these units can cut through an army with very little to stop them.
The jump pack Wolf Lord and Wolf Priest form a nice duo as well that can go into combat re-rolling hits and using Seeking a Saga and/or Mentor’s Guidance to re-roll wounds. The HQs in this list provide a lot of aura support in the early game, and keeping their melee weapons holstered until the board clears.
Tournament Overview
First I just have to give a shout out to my three opponents: Dustin, Chase, and Dineeth. All three of them were absolute gentlemen and a blast to play. Every one of them played very clearly and made their intentions clear, which is very important to making a TTS game go smoothly. If you ever get a chance to square off against them on the table be sure to seize the opportunity!
I did manage to record games 2 and 3 on my twitch account, and they are linked under each of the match headers. I must apologize that I am still a bit of a twitch noob and game 3 is upside down for the first two hours.
Game Number 1: Zoan-nopes
ITC Mission #3: Nexus Control
Deployment: Spearhead Assault
Round 1 I was paired against Dustin, resident Tyranid expert of the Northern Front Gaming group. I knew I would be in for a good fight kicking things off against the home team. He was running a mix of Kronos and a custom hive fleet.
Tyranid Battalion: Cranial Channeling, Membranous Mobility
Malanthrope: warlord
Neurothrope
Ripper Swarm x3
Ripper Swarm x3
Ripper Swarm x3
Maleceptor: massive scything talons
Zoanthropes x6
Zoanthropes x6
Zoanthropes x6
Tyranid Battalion: Kronos
Malanthrope
Neurothrope
Ripper Swarm x3
Ripper Swarm x3
Termagants x10: fleshborer
Hive Guard x6: impaler cannon
Biovore x2
Exocrine
It was clear the Zoanthropes would do a lot of the heavy lifting in his list, but I also had to be conscious of the output the Kronos Hive Guard and Exocrine can do.
Thunderwolf Cavalry are actually one of my strongest weapons against the Zoanthropes. Weight of attacks and Vicious Executioners make them very effective against their 3++ invulnerable save. Wulfen would struggle with the additional -1 to hit them in melee with the custom hive fleet, and things like catalyst no doubt protecting the forward blob. As such I shifted my strategy a little bit to using my Wulfen more as an offensive line unit, with the TWC assuming the role of the hammer in my list.
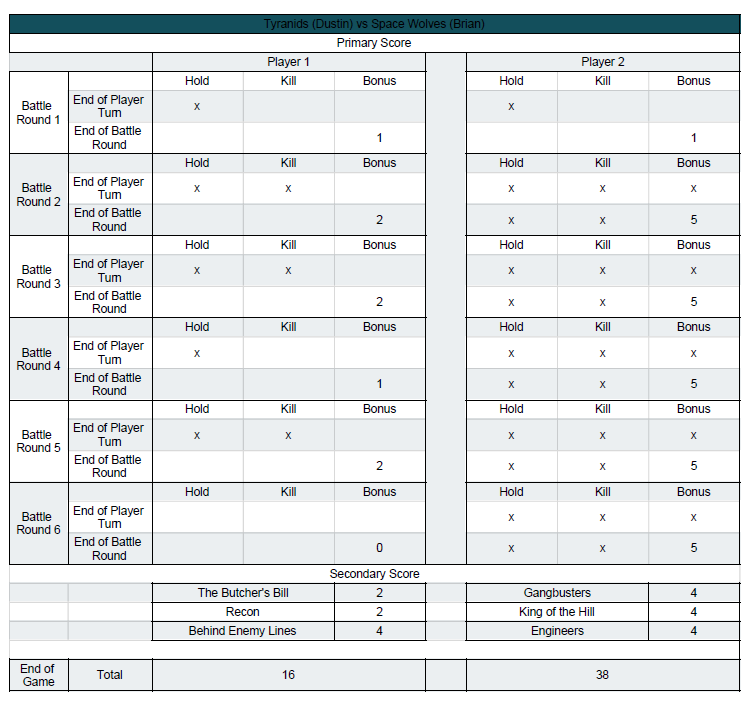
Dustin won the roll-off and decided to take first turn. He deployed the Hive Guard forward to maximize their first turn shooting and took The Butcher’s Bill, Recon, and Behind Enemy Lines.
I chose to forward deploy the Wulfen. I would use their toughness, budgeting CP for Transhuman Physiology, to let my main threats get into combat. I was also careful to deploy my other units forward enough to get towards the center for King of the Hill by turn two but wanted to force the Hive Guard to move if they wanted to get max shots on them, forcing him to give up his rerolling 1s to hit. I also made sure to utilize Litany of Faith and the Wolf Tail Talisman to buffer my defense against his mortal wound output.
First tun shooting went better than expected, his attempt to down an Impulsor with the Hive Guard was thwarted with some lucky 4++ saves. There was also a critical play giving me an edge, dropping a spore mine in front of my Wulfen from one of the Biovores. This let me heroically intervene the Wulfen, gaining 6″ of movement towards his line.
In my following turn I was able to get my Wulfen forward to set up a charge on his horde of Zoanthropes. I knew the Wulfen would be extending forward, but their job was to buy time. The Thunder Wolf Cavalry and Impulsors all moved up to prepare for a Turn 2 Assault. Ragnar got out with an Intercessor Screen to have a character in deny range for the following turn and provide some potential extra movement for the Wulfen and re-roll support for the Wulfen.
The Wulfen made their charge, but the Zoanthropes 3++ and Catalyst did a good job of mitigating the damage. I was very thankful for the Great Axes and Claws in this scenario as the additional -1 to hit from Membranous Mobility was proving its worth. With a fight twice, the Wulfen were able to do significant damage to two of the three squads, which would be incredibly important in reducing their mortal wound output. If the Wulfen could tank fire next turn and heroically intervene back into combat, they should be able to seal the game.
Dustin maneuvered backward, but the Wulfen tagging a lot of units in combat limited Zoanthropes to a 5″ fallback. There was still one full 6 man Zoanthrope squad threatening to put out a 3+D3 Smite into the Wulfen, which Ragnar was able to deny with the use of Talismanic Shield. This was a huge swing in the game, as even after the following shooting phase there were still 4 Wulfen remaining.
My following turn saw the second wave hit like a truck. The Thunderwolf Cavalry arrived on the scene using Vicious Executioners and re-roll support from Litany of Hate from the Wolf Priest. They deleted the 6 man Zoanthrope squad and utilized Ragnar’s Battlelust to pile into the Hive Guard, stopping them from shooting the following turn. This gave me supreme board control letting me dominate the primary mission for the rest of the game.
Dustin did get his revenge on the Thunderwolf Cavalry, with the Exocrine coming up big, killing the entire squad by double shooting, but ultimately the Impulsors and characters were able to push into his lines and secure the win.
Game Number 2: Bigger Badder Bugs
ITC Mission #6: Crucible of Champions
Deployment: Spearhead Assault
I found myself paired off against Chase from the Warthogs for Round 2. In a field of Space Wolf players, I had managed to draw against another Tyranid player! We had managed to capture the brain bugs last round, but would we stand up to all the massive scything talons?
Tyranid Brigade: Horror from Beyond, Prey-Sight
Hive Tyrant: monstrous scything talons, stranglethorn cannon
Hive Tyrant: monstrous scything talons, stranglethorn cannon
Tervigon: massive scything talons, resonance barb, stinger salvo
Ripper Swarm x3
Ripper Swarm x3
Ripper Swarm x3
Ripper Swarm x3
Termagants x20: fleshborer
Termegants x20: fleshborer
Hive Guard x6: impaler cannon
Lictor x2: flesh hooks, rending claws
Mucolid Sporesx3
Trygon x2: 3xmassive scything talons, prehensile pincer tail
Trygon Prime x3: 3x massive scything talons, adrenal glands, arachnacyte gland, biostatic rattle
I had a lot of advantages going into this matchup. With the tables having good LOS blocking terrain, the only real threat to the Wulfen were his Hive Guard. If I kept them back in reserve I could punish anything that came into my threat range. The Wolf Lord with jump pack was given The Armor of Russ and Saga of the Beastslayer which would be very hard for him to answer, so long as I kept him protected.
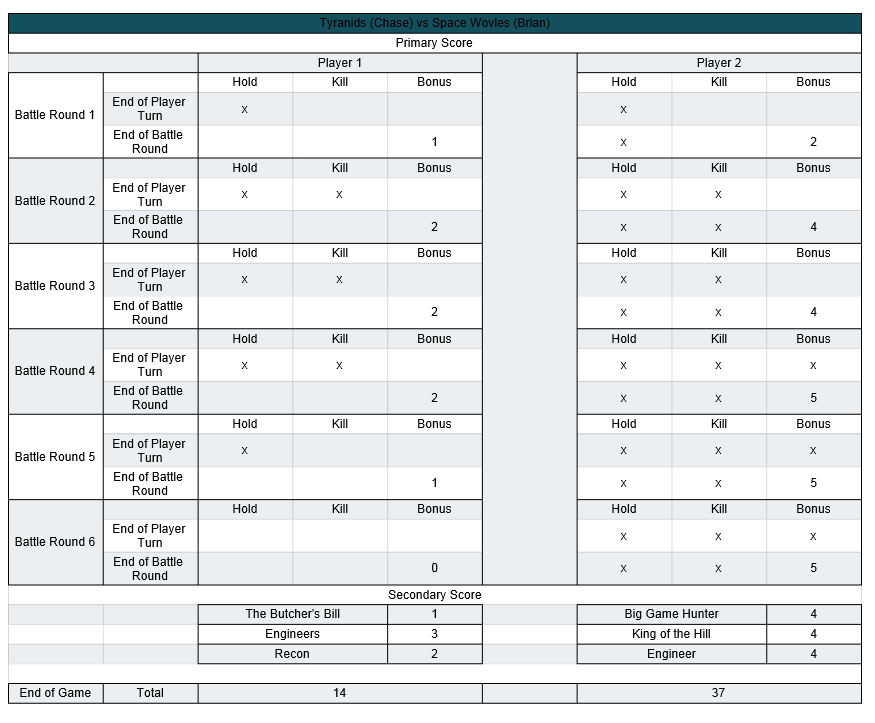
Chase won the roll-off and chose to take the first turn. With him going for Recon I chose to deploy very defensively to zone out his deep strikers as long as possible. If he wanted Recon and Behind enemy lines he would have to come to me. The Wulfen stayed back protected by the Impulsors and Incursors, while the Thunderwolf Cavalry were going to put some forward pressure on the Hive Guard and draw fire.
Ultimately it was a very uphill battle for Chase, and he took the opportunities he needed to win the game but made zero charges with his Trygons. With the Wulfen in position to counterstrike there was very little he could do to stop them. The Wulfen dominated their flank, while the jump pack Wolf Lord held fast on the opposite side.
Game Number 3: Taking on the Wolf-Slayer
ITC Mission #1: Seize Ground
Deployment: Vanguard Strike (note: we did end up using the second terrain setup when we should have used the first as per the tournament guidelines)
Game 3 I found myself at the top table paired with Dineeth of The Normal Blokes podcast (I highly recommend giving it a listen!). While I had avoided a Space Wolf mirror match in my first two games, Dineeth was busy beating them back left and right. He took out Jon Kilcullen in the first round of the tournament, and then in round two, he tackled Christopher Walker, who was in the lead after game one with a perfect 42 point win! I knew I had my work cut out for me.
Deathwatch Battalion
Librarian: jump pack, storm bolter
Watch Master: warlord
Veterans x4:
-Biker: teleport homer/twin boltgun
-Terminator x2: chainfist/storm bolter
-Terminator: power maul/storm bolter
-Vanguard Veteran: bolt pistol/storm shield
-Veteran x4: storm botler/storm shield
-Watch Sergeant: stormbolter, storm shield
Blood Angels Battalion
Astorath
Captain: jump pack, storm shield, thunder hammer
Chief Librarian Mephiston
Intercessorx5: Chainsword, bolt rifle
Scout Squadx5: combat knife
Scout Squadx5: combat knife
Death Company:
-Death Company Marinex4: thunder hammer
-Death Company Marinex6: boltgun, chainsword
If there is one thing Wulfen do not like it is high volume fire, especially with hellfire rounds always wounding on a 2+. This makes the Veteran Squads especially deadly versus the Thunderwolf Cavalry as well. The key would be only presenting Impulsors to him to fight and whittling down the veteran squads. I was prepared to sit in Tactical Doctrine two full turns if needed to keep the edge in that trade, because if it forced him into extending forward shift that power dynamic, it may give the opportunity I need to strike.
Both of us knew so much would be decided with the first roll of the game. Both of us wanted to be able to play cagey and have the second turn, and whoever was forced into going first would start feeling the pressure to act.
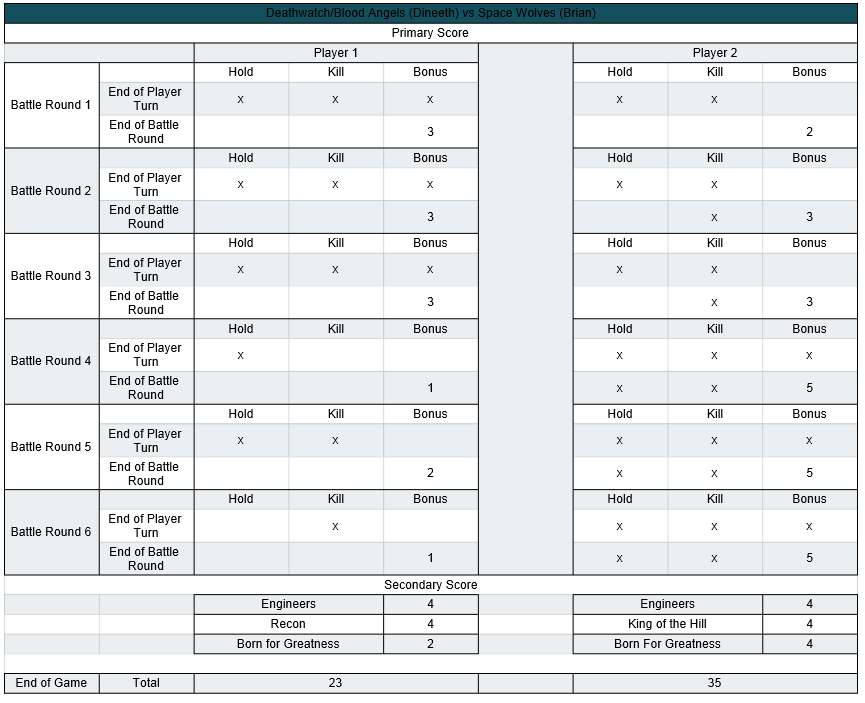
The first roll off of the tournament I won was a big one, and I chose to go second. I wanted to score points independently of having to kill his units so I chose Engineers, King of the Hill, and Born for Greatness on my Wolf Lord as my secondaries. Dineeth was on the same page taking Engineers, Recon, and Born for Greatness on Mephiston.
I had deployed one of my engineer squads on a side objective, trying to bait out one of his veteran squads. Even with losing one of my engineer squads, I was confident I could still max it since I could effectively keep the second screened and out of LOS. I had to start removing the Veterans to gain map control, so I had my TWC poised to counter charge if they went in for my Engineers. I placed the rest of my forces in the backfield to screen out his Veterans and jump pack Captain. I did take Shoot and Fade on the Phobos Wolf Lord this game to be able to move up the Incursors later in the game as well as let me move in and out of ruins to get potshots on his Veterans and Death Company as they dueled Impulsors. The Wulfen were hidden back behind a ruin as well to keep them protected until the later turns of the game.
Dineeth used his first turn to move out and control the center of the map. He trailed the Death Company just forward enough to entice a long charge from the Wulfen. He also sent one of his 4 Vet Squads out to take out my Engineer squad on the flank.
During my turn I countered by sending the Thunderwolf Cavalry into the Vet squad that eliminated my engineers. Between Crushing Assault and Vicious Exectuioners the TWC wiped the squad. One down, three to go. I did advance the Wulfen, rolling a 5…but decided not to move them. The DC in the middle of the board were bait, I still had to worry about a counter-attack from three Veteran squads, and the Wulfen were stopping Dineeth from being able to capture both central objectives. If he pushed onto the middle objective on my side, the Wulfen would have an easy charge and LOS blocking terrain stopping Deathwatch return fire. I decided to stick with my original plan, and practice what I preach, patience.
Turn 2 saw Dineeth expand his control to both objectives in the center to net himself the bonus once again. This time it was the Death Company who assaulted an empty Impulsor sitting on the point. Mephiston pushed his way up a flank to push a double recon score as well as setting himself up for a born for greatness point.
This was the moment I was waiting for. With the Death Company and Mephiston extending forward, now was the time for the Wulfen to strike. They advanced from cover and strung out to set up a kill on Mephiston and the Death Company. Fighting Twice the Wulfen were able to take down the Lord of Death and the two frost claws make short work of the Death Company. Looking back it was a fairly pivotal turn, giving me the upper hand in board control. In our post-game deliberation, Dineeth and I agreed that he should have played a bit more cautiously since it was still early in the game.
Turn 3 saw the Veterans counterpunch at the Wulfen Squads. They had limited access and line of sight, and Transhuman Physiology helped prevent devastating losses from the squad. This set up the Thunderwolf Cavalry to move up to the center and remove another Veteran Squad with the use of Vicious Executioners, their second kill of the game.
The pressure was on Dineeth to act now as control of the board was slipping from his grasp. He moved up the other two Veteran Squads, Watch Master, and Librarian. He was able to cast null-zone, but ultimately did not make his charges, and he was stranded awaiting the Space Wolf counter assault.
The Thunderwolf Cavalry had sustained a few losses, but powered up by Savage Fury in the Assault Doctrine, they were able to find a gap to the Librarian. The Pack Leader made short work of him with his thunder hammer, letting the remaining members of the units wipe their third Veteran squad of the game. With that assault clearing all of his assets of the middle objectives, the game was essentially sealed. We talked through our turns 5 and 6 and called it a game.
Final Results
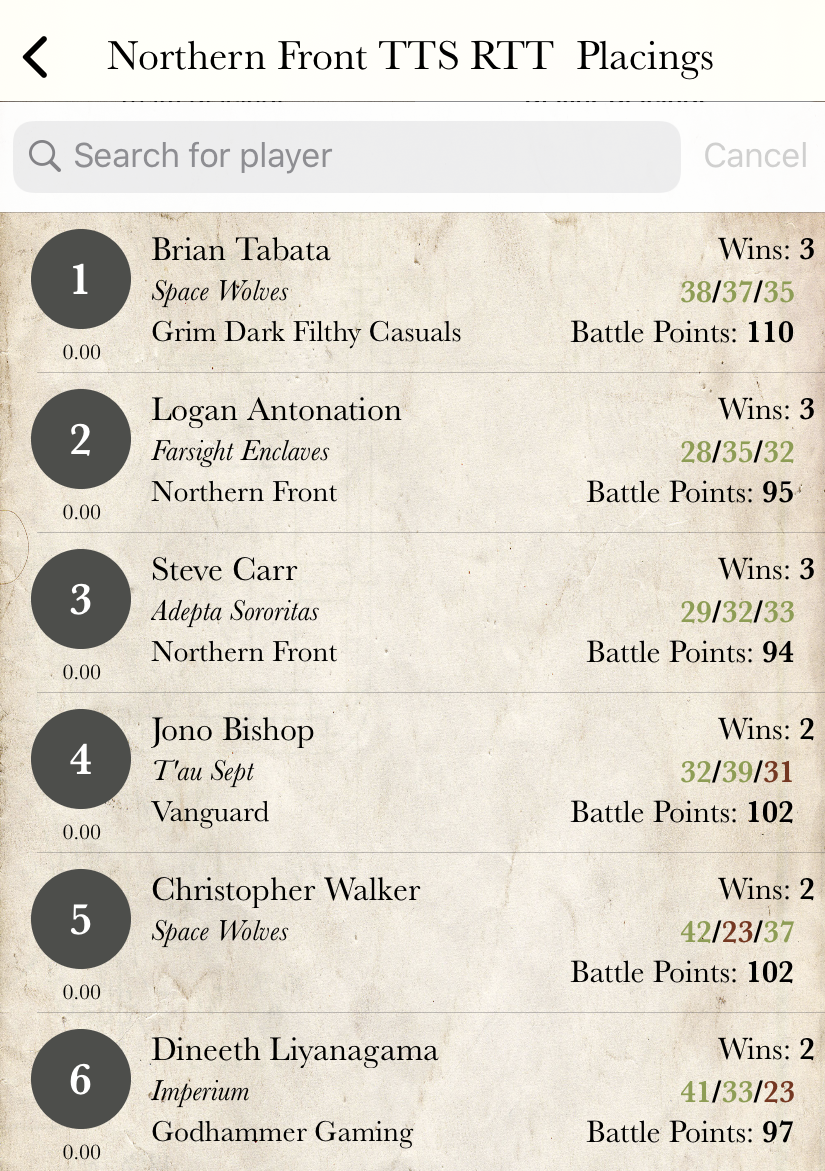
Space Wolves managed to take the overall win! It was a fantastic event, that forged new friendships across continents. The conversation I’ve had with my opponents has been more valuable than the games themselves! It was truly a great time, getting to experience some of that shared love for the hobby with people from all over that I missed out due to Adepticon being canceled this year. Thank you again to Jon and the Northern Front Gaming Group and my fantastic opponents!
We would love to hear your thoughts so please leave us a comment down below. If you got a chance to check out the games on Twitch I would love to hear suggestions on how I can improve the experience for you (I know there must be A TON!) We hope to resume our video content as soon as we can, but for now, we’re doing our part to promote social distancing and keeping our communities, families, and loved ones healthy.
If you’re interested in joining our Discord community, feel free to reach out to us at grimdarkfilthycasuals@gmail.com and please follow us on the usual platforms to stay up-to-date with all of the latest releases from GDFC.
- Twitter: @GDFilthyCasuals
- Instagram: grimdarkfilthycasuals
- Facebook: grimdarkfilthycasuals
- Youtube: GDFC Youtube Channel
is a founding member of Grim Dark Filthy Casuals, Content Director, Editor, Author, Coach and Chief Dad Joke Officer

Paulo Ruiz
Hello! seems you have a very solid list, there, would love to check it in action, would you please share your twitch account. Thanks!
Brian Tabata
click on the headers for game 2 and 3! Apologies in advance as the stream is not perfect, but I’ll keep working on it!
If that doesn’t work search Octotako7 on twitch.
Jordan K
Super glad you posted this in the SW community page on FB, I’ve probably read over this article at least 3 times now always with new things to think about. I haven’t explored all of the content regarding SW’s that you’ve put out so apologies if there’s something already out there regarding the questions I have,
I currently use Stormfangs to counter the flyers I come across in my meta but this has led me to a list with no primaris whatsoever as I run greyhunters for my troops choices both transported in the stormfangs and a razorback. My problem is going into 9th I don’t see my 1 wound greyhunters lasting very long(I currently have this problem as well with indirect fire units such as TFC’s and hiveguard) I’d like to make the switch intercessors but I would have to ditch my stormfangs for impulsor transport as well. What is your solution to flyers especially headed into 9th? If I did switch, are assault intercessors the go too now? or should I still consider regular intercessors with the PL using a TH as you are.
Brian Tabata
Thanks for commenting Jordan!
1. Addressing Flyers: Admittedly flyer spam is a tough match-up for my list. I was mostly banking on the list falling out of popularity. If I did face it the gameplan is use my board control to stay ahead in the primary mission. My units can be fairly hard to remove, and if I can bait an opponent to bunch of some flyers I can take a few out with the smash wolf lords/wolf priest.
As for dealing with flyers in 9th, I do think flyer spam will be harder to achieve, due to CP tax for extra detachments and the removal of the air wing detachment. I also intend to build a list focused around scoring the primary and secondaries to effectively let me ignore the flyers (remember you dont have to kill everything in your opponents army). Ultimately, there are still a lot of question marks with 9th, so we will have to do some testing! I think I want to bring a little more firepower in my lists, as I think dreadnaughts and some other vehicles might become a bit more popular.
2. Assault Intercessors are very cool and I will be interested in trying out a few. I think there is still a lot of value in regular Int’s though as they can shoot well and still pack a punch with special weapons on the Pack Leader. I think ultimately you will want both as the assault Ints are great at working into enemy territory, but regular Ints give you a lot of flexibility and tactical options in game.
Overall I am very excited to see how things will develop in 9th. If you have an interest in joining our Discord and joining the conversation there, send an email to grimdarkfilthycasuals@gmail.com or send me a DM on facebook!